Friday, May 26, 2017

Get More Info from the Wi-Fi Menu


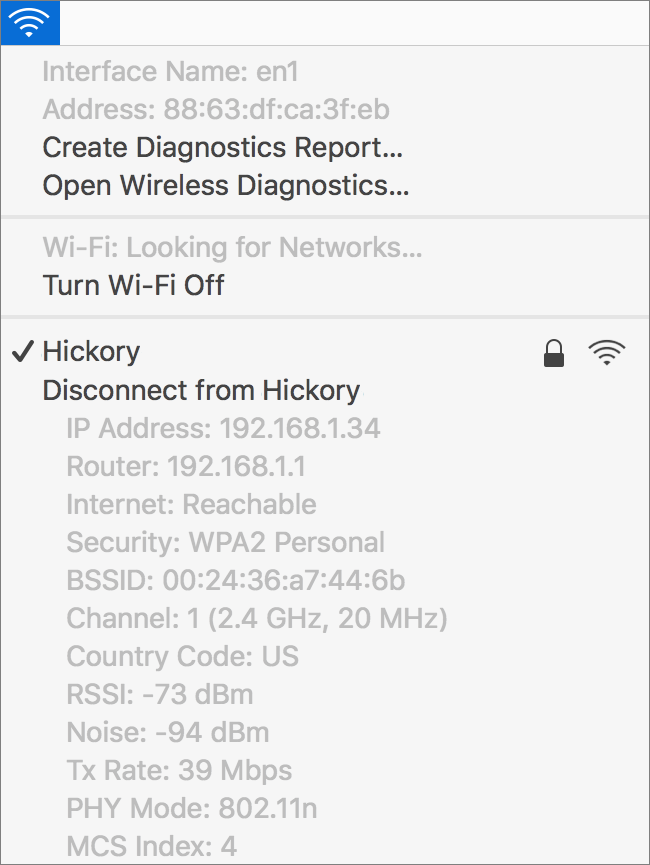
By default, the Wi-Fi menu on your Mac’s menu bar provides a list of available Wi-Fi networks and a few other commands. Useful stuff, but for the real scoop on what’s going on behind the scenes, Option-click the Wi-Fi menu. In addition to several commands to run diagnostics, the menu provides oodles of details about the current Wi-Fi network. 

You will find info on your Mac’s IP address, your router’s IP address, if your Mac is reachable from the Internet, what form of security is in play, the router’s BSSID identifier (helpful if you’re not sure which router you’re connected to in a complex network), which channel you’re using, how strong the signal strength is (RSSI—the closer to zero, the better), and the transmit rate of the network. This information is most useful when troubleshooting problems, so take a look if something isn’t working right with your connectivity.

Saturday, May 20, 2017

Break the iPad’s Virtual Keyboard in Half for Thumb Typing

The iPad’s onscreen keyboard is an awkward size—too small for adults to type on like a regular keyboard in landscape mode, but too large to thumb-type on like an iPhone in portrait mode unless you have large hands like a pro basketball player. If you fall into the thumb-typing camp, there’s a hidden feature in iOS just for you. 

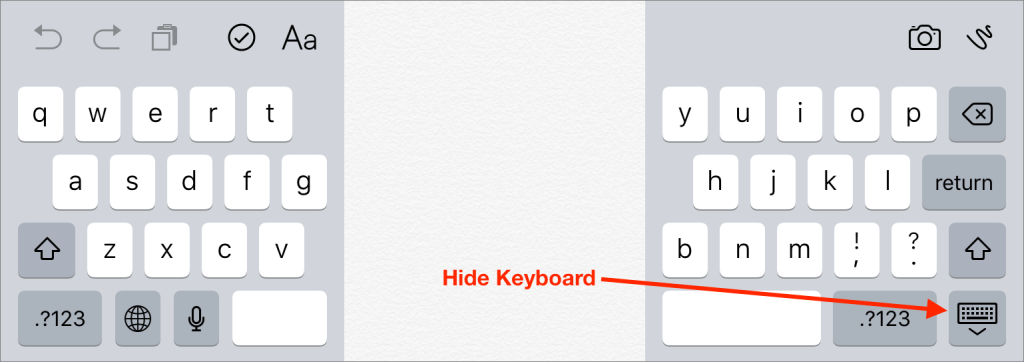
When you’re looking at the keyboard, press and hold the Hide Keyboard button in the lower-right corner, and then slide up to the Split option. The keyboard breaks in half and moves up the screen. (You can also just swipe outward quickly with both thumbs.) Now you can cradle the iPad in your palms and type with your thumbs. To rejoin the two halves of the keyboard, press and hold on Hide Keyboard again and tap Merge. (Or, swipe inward quickly with both thumbs.) Alternatively, tap Dock and Merge, or drag down on the Hide Keyboard button until it docks at the bottom of the screen. Enjoy!

Thursday, May 18, 2017

Three Clipboard Utilities to Enhance Copy & Paste

Perhaps the greatest unheralded innovation of the computer age is Copy & Paste. You may not think about the humble clipboard much, but Copy & Paste has saved you incalculable amounts of effort by enabling you to copy something you’ve done before to the clipboard, paste it into another document or app, and make any necessary changes. Whether you’re updating a monthly report, tweaking graphics for an annual party, or entering sales numbers in a custom database, Copy & Paste ensures that you don’t have to retype data or start from scratch.
What if you could make Copy & Paste even more powerful? With the right clipboard utility installed on your Mac, you gain two major new features:
  • Use clipboard history to access previously copied data. By default, every time you copy something to the clipboard, it replaces whatever was there before. With a clipboard utility, though, you can see a list of items you’ve previously copied to the clipboard and paste any one of them, which is vastly easier than finding and copying the data again. Clipboard utilities even preserve your clipboard history across restarts!
  • Edit or filter the data on the clipboard before pasting. This capability is useful, for instance, if there’s a mistake in the contents of the clipboard, if you copied styled text but want to paste plain text, or if you want to replace all double spaces in the copied text with single spaces.
Which clipboard utility is right for you depends on what else you might want it to do, or you might even have one installed already without realizing. That’s because clipboard enhancements are a bit like blades in a Swiss Army knife: they tend to be bundled into other utilities. You won’t go wrong with any of these clipboard boosters: the macro utility Keyboard Maestro, the launcher LaunchBar, and the dedicated clipboard helper Copy’em Paste.
Keyboard-Maestro-iconKeyboard Maestro ($36) is a macro utility, which means that it lets you string together a series of actions—copy this, switch apps, click there, paste, switch back, for instance—and then invoke that series with a trigger such as a hotkey, menu command, timer, or system activity. Keyboard Maestro offers hundreds of actions and numerous triggers, but from the clipboard perspective, it provides a persistent clipboard history, multiple named clipboards, filtering of clipboard contents when pasting, removal of styles from pasted text, and a user-specified hotkey for anything you want to do. You cannot, however, edit clipboard text manually.
LaunchBar-iconLaunchBar ($29) is a launcher, so its primary feature is opening or switching to an application or file by typing a hotkey followed by a few letters from the name of the app or file. That’s hugely useful in its own right, but LaunchBar also maintains a filterable clipboard history across restarts, lets you paste a clipping as plain text, and can merge copied text with whatever is already on the clipboard. Other apps in this category include Alfred (with the optional £19 Powerpack), Butler ($20), and QuickSilver (donationware).
Copy'em-Paste-iconCopy’em Paste ($14.99) focuses on clipboard enhancements, bundling nearly every clipboard-related feature you could want into an attractive interface. It offers a full clipboard history, makes it easy to paste multiple items quickly or even in a batch, can transform pasted text in a variety of ways, and lets you organize clippings into groups. It also enables you to edit text clippings, search for text in your clippings, and ignore apps whose clipboard changes just clutter your clipboard history. A major competitor is CopyPaste Pro ($30).
Regardless of which of these utilities you choose, you’ll soon be a pro at juggling the contents of your clipboard … and wasting a ton less time!

Monday, May 15, 2017

Prepare for the Worst with an iPhone Medical ID

No one expects to be in an accident, but if you are, and if you end up in a state where you can’t speak with the emergency responders, wouldn’t you like your iPhone to help? Once you enter your medical data and emergency contact info into Apple’s Health app, anyone can use your iPhone to learn about your medication allergies and other conditions, plus contact your family. Even if you are too shaken up to share your details clearly, you may be able to point at your phone sufficiently to show your Medical ID. This data could also help a Good Samaritan return a lost iPhone (unfortunately, the Health app isn’t available on the iPad).
To enter this essential information in your iPhone, follow these steps.
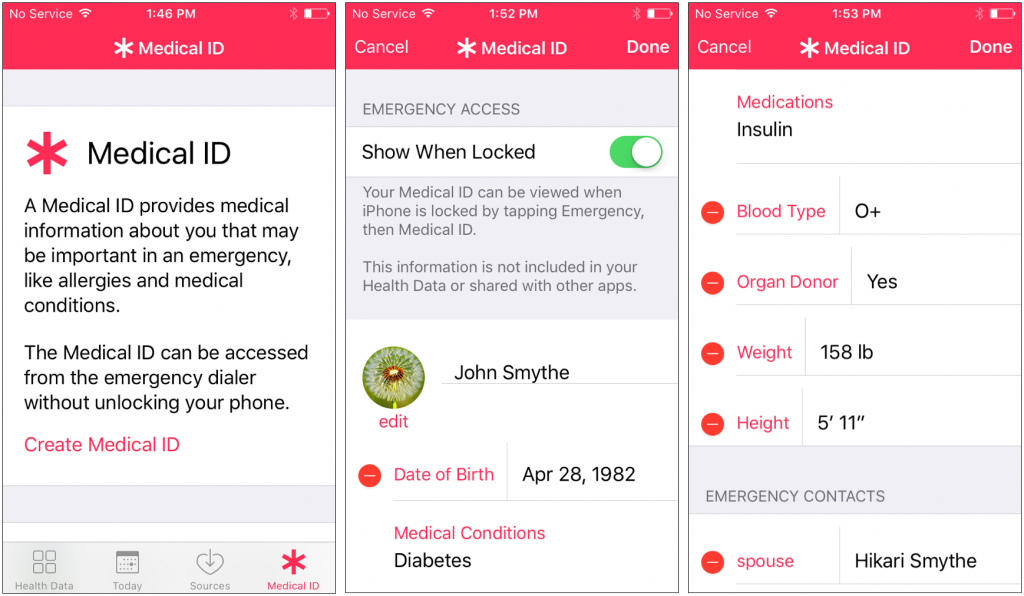
  1. Open the Health app, and tap Medical ID in the button bar at the bottom.
  2. Tap Create Medical ID on the first screen that appears.
  3. In the Medical ID screen, make sure the Show When Locked switch is on.
  4. Enter all the relevant details about your medical conditions, medications, allergies, and so on.
  5. Specify one or more emergency contacts. These must be people in the Contacts app with phone numbers; if the right people aren’t there, add them first. You can’t select your own card in Contacts, so consider making one for a fake person called “If Lost, Please Call” and listing a different phone number at which you can be reached.
  6. Tap Done once you’ve finished entering your information.
Hopefully, you’ll never have to use someone else’s Medical ID information, but you should know how to do so. You should also teach family, friends, and colleagues how to find and use this information. Should you come across a bicyclist who has had a bad crash or a similar situation, follow these steps:
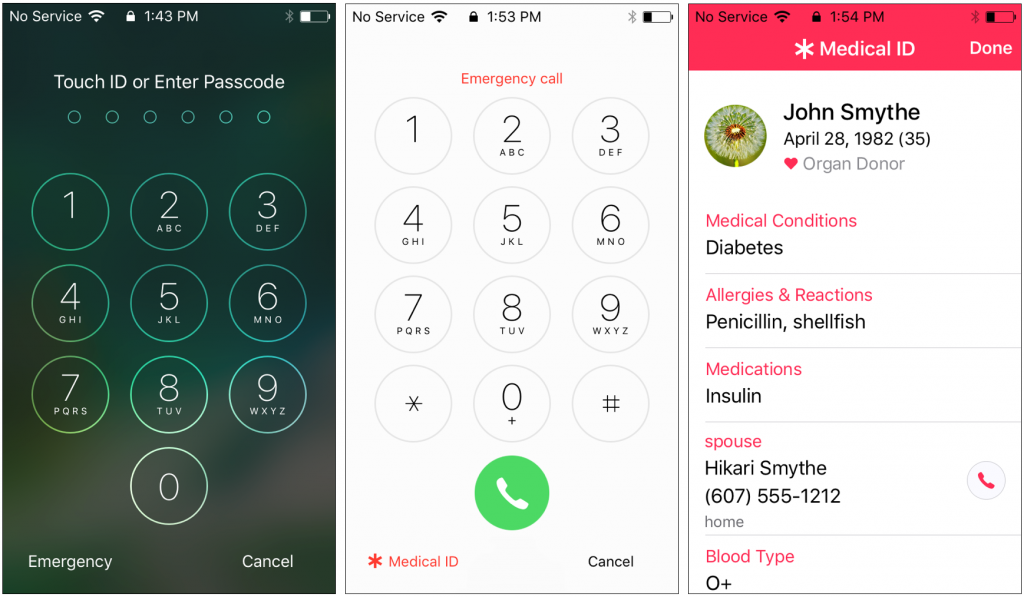
  1. With a locked iPhone, press the Home button to display the Passcode screen.
  2. On the Passcode screen, tap Emergency in the bottom-left to move to the Emergency screen. If needed, call 911 from this screen.
  3. Again at the bottom left, tap Medical ID to display the Medical ID screen, complete with all the details that person entered into the Health app.
  4. From that screen, you can share the information with EMTs or other first responders so they’re aware of any serious conditions or allergies that would affect treatment. You can also call any emergency contacts listed.
Please, enter your medical and emergency contact details into the Health app right now, and spread the word to everyone you know. It could save your life, or help you save someone else’s!

Friday, May 12, 2017

Are You Still Using POP for Email? Switch to IMAP!

When you read an email message on your iPhone and delete it, do you have to trash it again when you check mail on your Mac? Or is your email kept in sync such that if you delete a message on one system, it never even appears on the other?
If you fall into the first camp, your Internet service provider probably has you using an email technology called POP. Conversely, if you’re in the second camp, you’re likely relying on a different email technology called IMAP. Don’t worry what POP and IMAP stand for — they could be called Fred and Jane for all that it matters. What does matter is that if you’re using POP to read email on more than one device, you’re wasting time and effort.
When POP was designed in 1984, few people checked mail from more than one computer. That’s why, when you download email from a POP server, it is immediately deleted from the server by default. That makes it impossible to check email from more than one computer, so POP’s designers added an option to download a message without deleting it so you could retrieve it again. Since the POP server has no way of knowing that the message was transferred multiple times, each computer that gets it sees it as a fresh message, forcing you to delete or file it on each device.
In contrast, IMAP, which came along just a couple of years later in 1986, was designed to keep all your email on the mail server itself so multiple computers could access the same set of messages. And, most important, anything you do to a message—delete, file, or reply—in your email app on one computer also happens on the IMAP server, so if you check email from another computer, your email collection reflects all those earlier actions.
Fast forward to today, where you might check email with your Mac at work, with your iPhone while at lunch, and on your iPad at home. If your Internet service provider is using IMAP, anything you do on any of your devices is reflected on all the rest. As an extra bonus, you can search through all your email at any time, from any device, which is great when you realize you need the address for today’s meeting after you’re in the car.
But some ISPs still rely on POP, and for those of you who have had the same email account for many years, even if your ISP supports IMAP, they may not have switched you over. If your email is stuck in the POP past, call your ISP and bring your email into the 21st century. If they aren’t willing to help, remember that you can always use your free iCloud email account instead or sign up for a free account with Gmail or Yahoo.
For those who are shaking your heads because you don’t want some IMAP server in the cloud to hold the only copy of your precious email, rest assured that it doesn’t have to be that way. By default, Mail downloads a copy of every message and keeps it locally on your Mac too, so even if something bad were to happen in the cloud, you would still have your local copy and your backups of it.
Life is too short to waste time dealing with the same email messages on multiple devices. Computers and smartphones are supposed to make things easier, not harder, so if you’re not already using IMAP for email, do yourself a favor and switch.

Spectrum email settings

AT&T email settings 

If you need help with another provider, drop a line below and I will try to find settings for you.
Monday, May 8, 2017

11 Ways to Ensure Your iPhone Battery Life Goes to 11

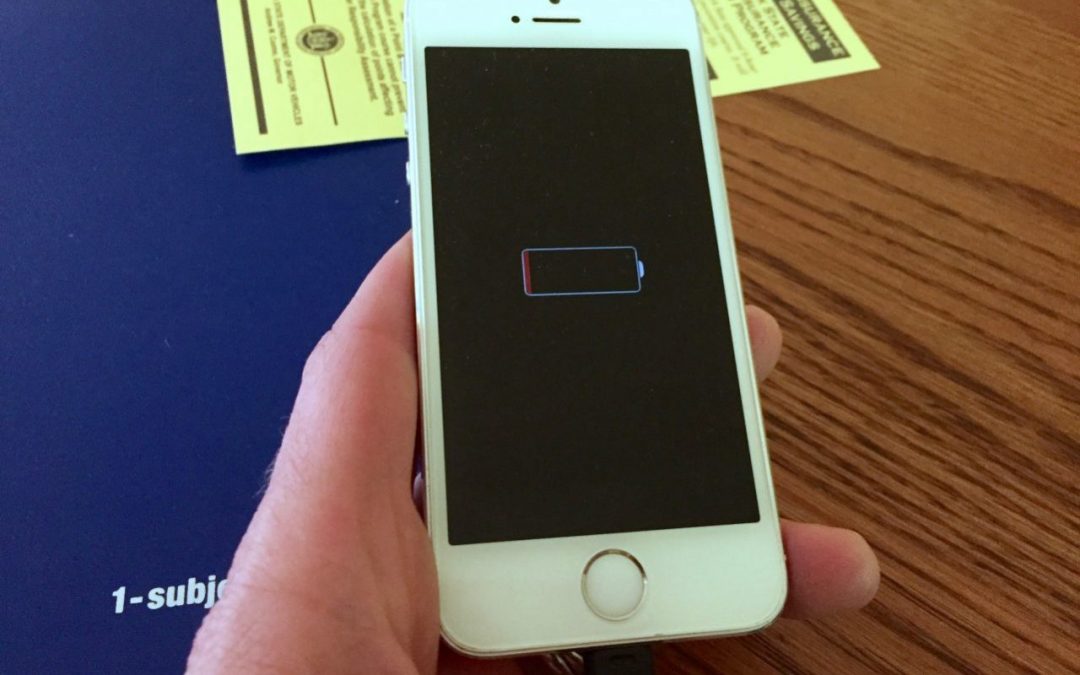
It’s inevitable. At some point, you’ll need your iPhone, but its battery will be dead. And as an iPhone ages, its battery becomes weaker, to the point where it may have trouble making it through a typical day of use. Charging the iPhone during the day may stave this off, and you could lug around an external battery (or have the battery replaced!), but a few simple tweaks will cut power usage and extend your battery life:
  • Don’t stream media or use GPS navigation when battery life is paramount, since these are the most power-hungry activities you can engage in on your iPhone. If you do use GPS navigation, make sure it stops (or stop it manually) when you reach your destination. Similarly, store music locally rather than streaming it via Apple Music or Spotify.
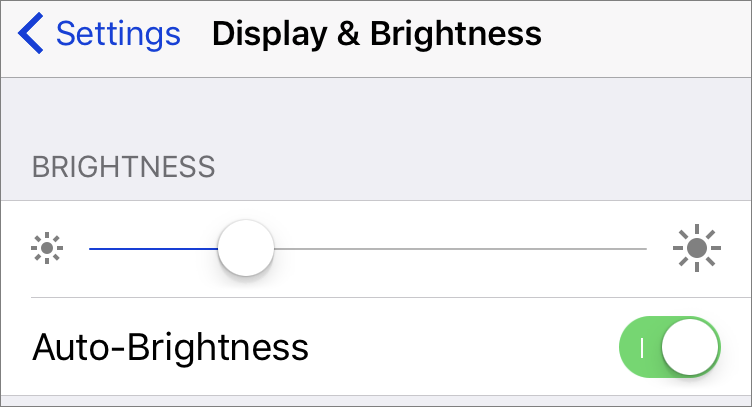
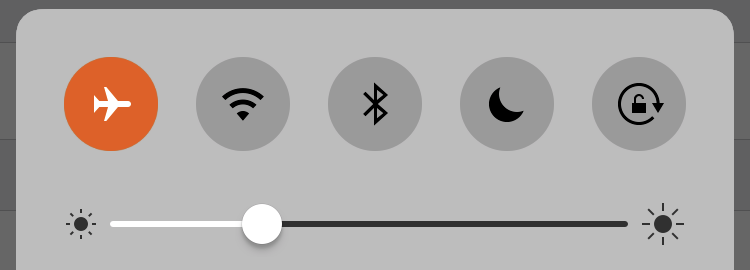
  • Reduce screen brightness. The screen takes a lot of power, so you’ll save juice if you drag the brightness slider to the left in Settings > Display & Brightness (you can also adjust brightness in Control Center; swipe up from the bottom of the Lock screen or Home screen). Also turn on the Auto-Brightness switch so iOS can reduce brightness automatically in dark conditions.

  • Turn off unnecessary notifications in Settings > Notifications to prevent apps from waking your iPhone’s screen repeatedly—turning it on to display a notification takes power.
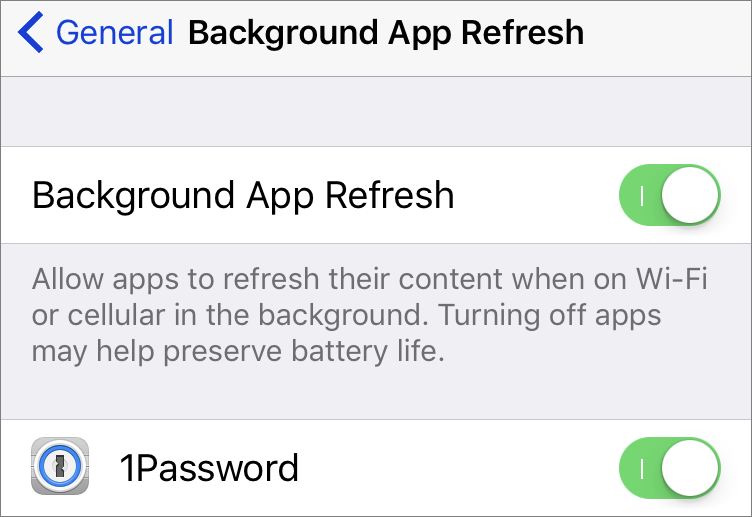
  • Turn off Background App Refresh. This setting, located in Settings > General > Background App Refresh, lets you prevent apps from updating themselves in the background, which can chew power. Disable any unnecessary apps here, or turn off the feature entirely.
  • Adjust Location Services usage in Settings > Privacy > Location Services. It’s best to leave Location Services turned on in general, but if you have little-used apps set to Always, consider changing their setting to While Using the App or Never. Apps that have recently used location services display a purple indicator (scroll to the bottom of the list for a key to the indicators).
  • Turn down the volume and use earbuds when possible. Using the iPhone’s speakers draws power, so the lower the volume, the less power used. Plugging in earbuds reduces audio-related power usage even more. Along the same lines, when sending audio to a remote speaker, Bluetooth uses less power than AirPlay.
  • Use Airplane Mode in weak cell coverage areas. When the iPhone is searching for a better signal, it increases power to its radios, which hurts battery life. Going into Airplane Mode (tap Settings > Airplane Mode or tap the Airplane Mode button in Control Center) prevents you from making or receiving calls or SMS text messages but saves a lot of power. Just remember to disable Airplane Mode later!
  • Use Wi-Fi in favor of cellular. Since Wi-Fi can use less power than cellular data (particularly when the cell connection isn’t strong), connect to a Wi-Fi network when possible; go to Settings > Wi-Fi to find an available network if you’re not prompted automatically (which you can turn on with Ask to Join Networks in that screen). Also, in Settings > Cellular, scroll down to see an app list and disable cellular data for apps that you don’t need while out and about, but that are transferring non-trivial amounts of data.
  • Disable automatic downloads, or restrict them to Wi-Fi. In Settings > iTunes & App Stores, you can disable automatic downloads for purchased music, apps, and books made on other devices, which could save a little power. Or just disable Use Cellular Data in that screen, which increases the likelihood that the downloads will happen on Wi-Fi when you’re near a charger.
  • Avoid extreme cold or heat. Cold temperatures will drastically reduce your iPhone’s battery life, albeit temporarily, whereas hot temperatures can permanently hurt the battery’s ability to hold a charge.
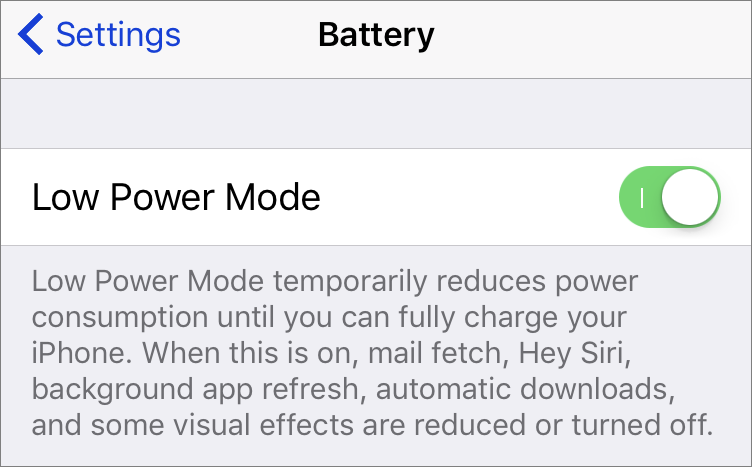
  • Enable Low Power Mode. In Settings > Battery, flip the switch for Low Power Mode to tell your iPhone to use less power for a variety of background activities and visual effects. iOS automatically prompts you to turn Low Power Mode on when the battery drops to 20%; it’s best to accept that suggestion. Low Power Mode is automatically disabled when the iPhone charges sufficiently.

Thursday, May 4, 2017

Beware, 2 New Trojan Malwares and 1 sophisticated phishing attack currently circulating


This week has brought some nasty malware Trojans and a very sophisticated phishing attack to the Mac platform. Here are the details you need to know.  Lets break these down.

OSX/Dok

The Good: Apple has revoked the developer certificate that allowed this Trojan to get past Gatekeeper. They have also updated their XProtect silent malware signature system, so that Mac OS will not allow it to install now. Be sure to run any Apple Security updates from the App Store, accessed from the Apple in the upper left hand corner of your screen.


The Bad: If you have been infected, you need to read below for what OSX/Dok has done to your computer, and you should change ANY passwords you may have used since you were infected.

Malwarebytes Anti-Malware for Mac (FREE) will detect the important components of OSX/Dok, and disable the active infection. However there will still be lingering issues. Per Malwarebytes 


When it comes to the other changes that are not easily reversed, which introduce vulnerabilities and potential behavior changes, additional measures will be needed. For people who don’t know their way around in the Terminal and the arcane corners of the system, it would be wise to seek the assistance of an expert, or erase the hard drive and restore the system from a backup made prior to infection.


The Ugly:  Early in the week, the first Trojan named OSX/Dok was discovered. It is apparently spread via email, pretending to be from the IRS. Messages like “Something is wrong with your tax return, please fill in this document” Users would attempt to open the document, only to have an error appear that the document “could not be opened”. Meanwhile the malware would then copy files to the computer, which eventually would result in the following popup, covering all other windows on the screen.


Once the popup appeared, you could not do anything except manually power off, or accept the message and install a fake update. Once installed, all of your web traffic is routed to a malicious server first. That means anything you do on or across the internet is first seen by the hackers. Your bank login, they have that now …. Your email password, that too. If you were infected, follow the link above for Malwarebytes, change all your passwords, and consider restoring your computer from a previous backup.


OSX/Bella:   

A variant of OSX/Dok was discovered, and had been labeled OSX/Bella – Its transmission was exactly like OSX/Dok and used the same developers certificate. It however installed different tools. Malwarebytes has been updated to detect OSX/Bella as well. Follow the same precautions as OSX/Dok above.


Google Phishing Scam:


The Good: Google was made aware of the issue and took down the fake pages within hours. A statement from them reads


We’ve removed the fake pages and our abuse team is working to prevent this kind of spoofing from happening again. If you think you may have accidentally given out your account information, please reset your password.”


The Bad: If you were hit with this and followed through, you need to do a number of things. First and foremost, change your passwords now. You can use a password manager like 1Password to help you come up with hard to guess passwords, and remember them all for you.

Second you need to check your google account for 3rd party access and remove any you do not recognize. Go to the Permissions page, and  revoke any access you are not sure of.

Third, you may want to consider using Google Chrome as your browser, and install Password Alert. It will warn you if you attempt to enter your Google password into any site that trying to impersonate Google.


The Ugly: The scam starts like most, with an email. This particular scam directed people to open a Google Document that someone had shared with them. It included a link to Google Docs, but then took you to a authentication page asking you to grant Google Docs access to your Gmail account. The problem was this was a fake non-Google web app with a fake name of googledocs. The authentication page looks real, as it’s a real Google page, but you are really granting access to a 3rd party. See the following video of the scam in action.

https://twitter.com/zachlatta/status/859843151757955072/photo/1

If you clicked the link, your account has likely sent the same spam to everyone in your address book. Be sure to follow the solutions in “The Bad” above.

Monday, May 1, 2017

Erase iOS Devices Before Passing Them On


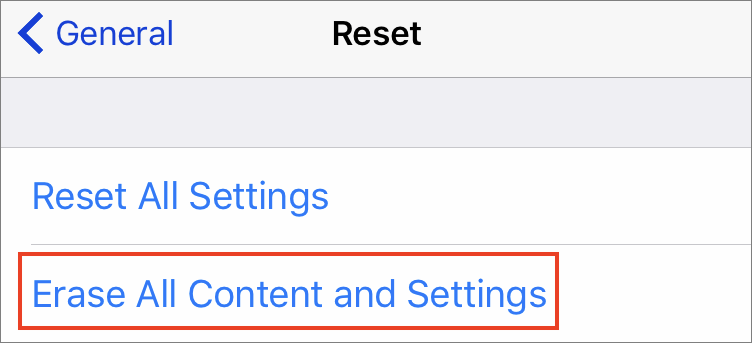
If you have an old iPad, iPhone, or iPod touch that you want to sell or give away, you don’t want to leave any of your apps, data, or personal information on the device. Luckily, Apple makes it easy to reset your idevice to factory defaults. 

Go to Settings > General > Reset (all the way at the bottom) and then tap Erase All Content and Settings. Enter your passcode, confirm the erasure (twice!), and then type your Apple ID password (if you have Find My Phone turned on, like you should!). After all that, the device restarts just as though you’re taking it out of the box for the first time. Now your ready to sell or give the device away, without any of your information on it.