Monday, June 18, 2018

Quick Tip - Enable Theater Mode to Prevent Your Apple Watch from Lighting Up at a Show

Attend any live theater presentation, and someone will ask the audience to silence their cell phones. But what about your Apple Watch? You don’t want it lighting up or making noise during the show either.

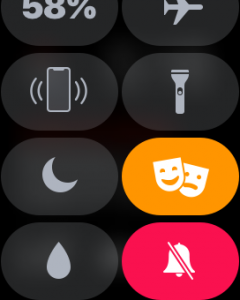
To ensure that doesn’t happen, swipe up on the face to display Control Center, and then tap the theater masks icon to enable Theater mode (you may have to scroll down to see it). That automatically turns on Silent mode and prevents the screen from lighting up unless you tap it, press a button, or on the Apple Watch Series 2 or 3, turn the Digital Crown. To leave Theater mode after the performance, tap the masks icon in Control Center again. Enjoy!

Friday, June 15, 2018

Apple Pay Is Faster, Easier, More Secure, and More Private Than Using Credit Cards

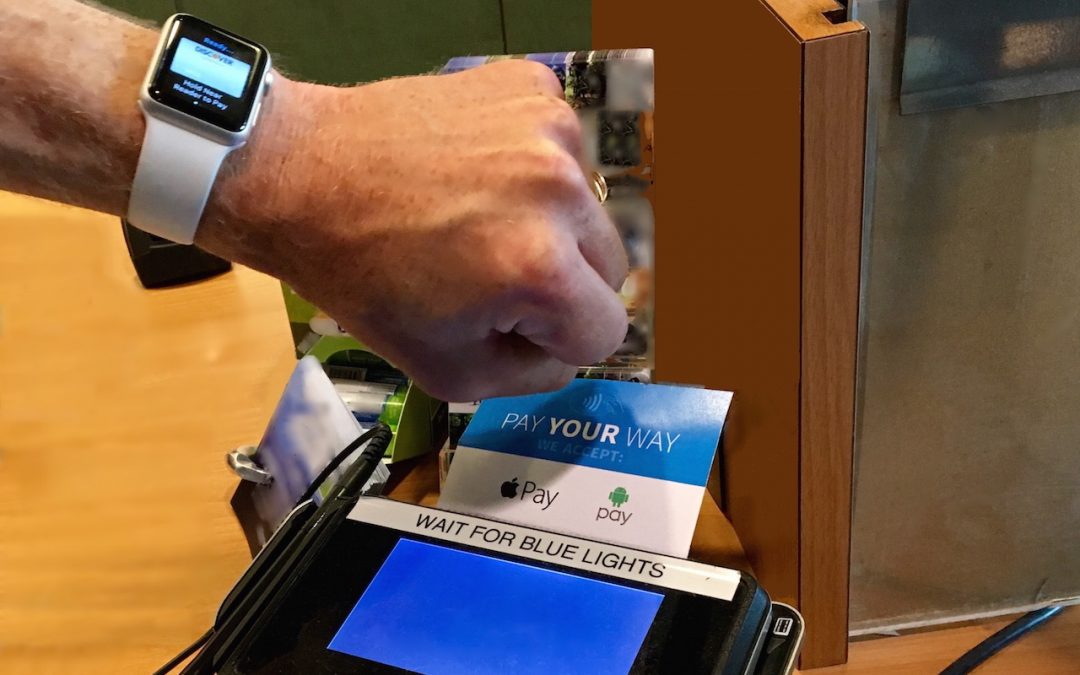
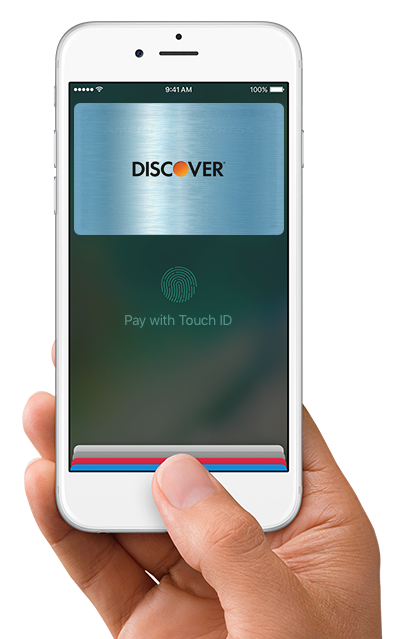
You’ve probably heard of Apple Pay, but have you set it up so you can use it to pay for purchases at checkout? If not, give it a try, since it’s one of those living-in-the future Apple technologies that feels like science fiction every time you use it. Simply put your iPhone, iPad, or Apple Watch within an inch or so of a compatible payment terminal (look for an Apple Pay  or contactless payment  logo), put your finger on the Home button to use Touch ID (or double-press the iPhone X’s side button and authenticate via Face ID, or double-press the Apple Watch’s side button), and you’re done. The entire transaction takes less time than opening your wallet, although you may still need to sign a receipt.
What happens behind the scenes when you use Apple Pay? The good news is that Apple Pay is significantly more secure than a magnetic-strip credit card and has advantages over chip-embedded cards too. First, theft prevention is baked in. A typical thief can’t use Apple Pay from your device because they can’t get past Touch ID or Face ID, or provide your Apple Watch passcode.
Also, the store where you shop gets no data about you—they don’t know who you are, where you live, what your card number is, or anything else unless you showed a rewards card or provided your phone number. Most importantly, you don’t have to worry about your credit card number being jotted down, scanned, or skimmed.
How does this seemingly magical process work? When you set up Apple Pay, the Wallet app sends your encrypted credit card details to Apple, after which they’re passed along to your card’s payment network. What comes back is an encrypted Device Account Number—a long number that’s stored in the Secure Enclave chip on your device. That chip is protected by a digital moat, keeping it isolated from nearly all activity on your device. The Device Account Number is unique to your device and card, so nobody else can use it.
When you pay with Apple Pay, the Secure Enclave chip transmits the Device Account Number, along with a few other details, including a one-time transaction code. Everything is encrypted, so even if an attacker were listening to the traffic, no transaction details would be revealed. The information remains encrypted until it reaches the appropriate party, at which point, if all goes well, your transaction is approved and processed.
Millions of payment terminals in the United States accept Apple Pay, including those found in most major national chains, so you shouldn’t have to look far to find one. You can also use Apple Pay in some iOS apps and some Web-based shopping carts when checking out in Safari.
To set up Apple Pay, on your iPhone or iPad, tap Settings > Wallet & Apple Pay > Add Credit or Debit Card and follow the easy instructions—it’s fine to let the device scan your card so that you don’t have to type your credit card number; the image is discarded immediately after setup.
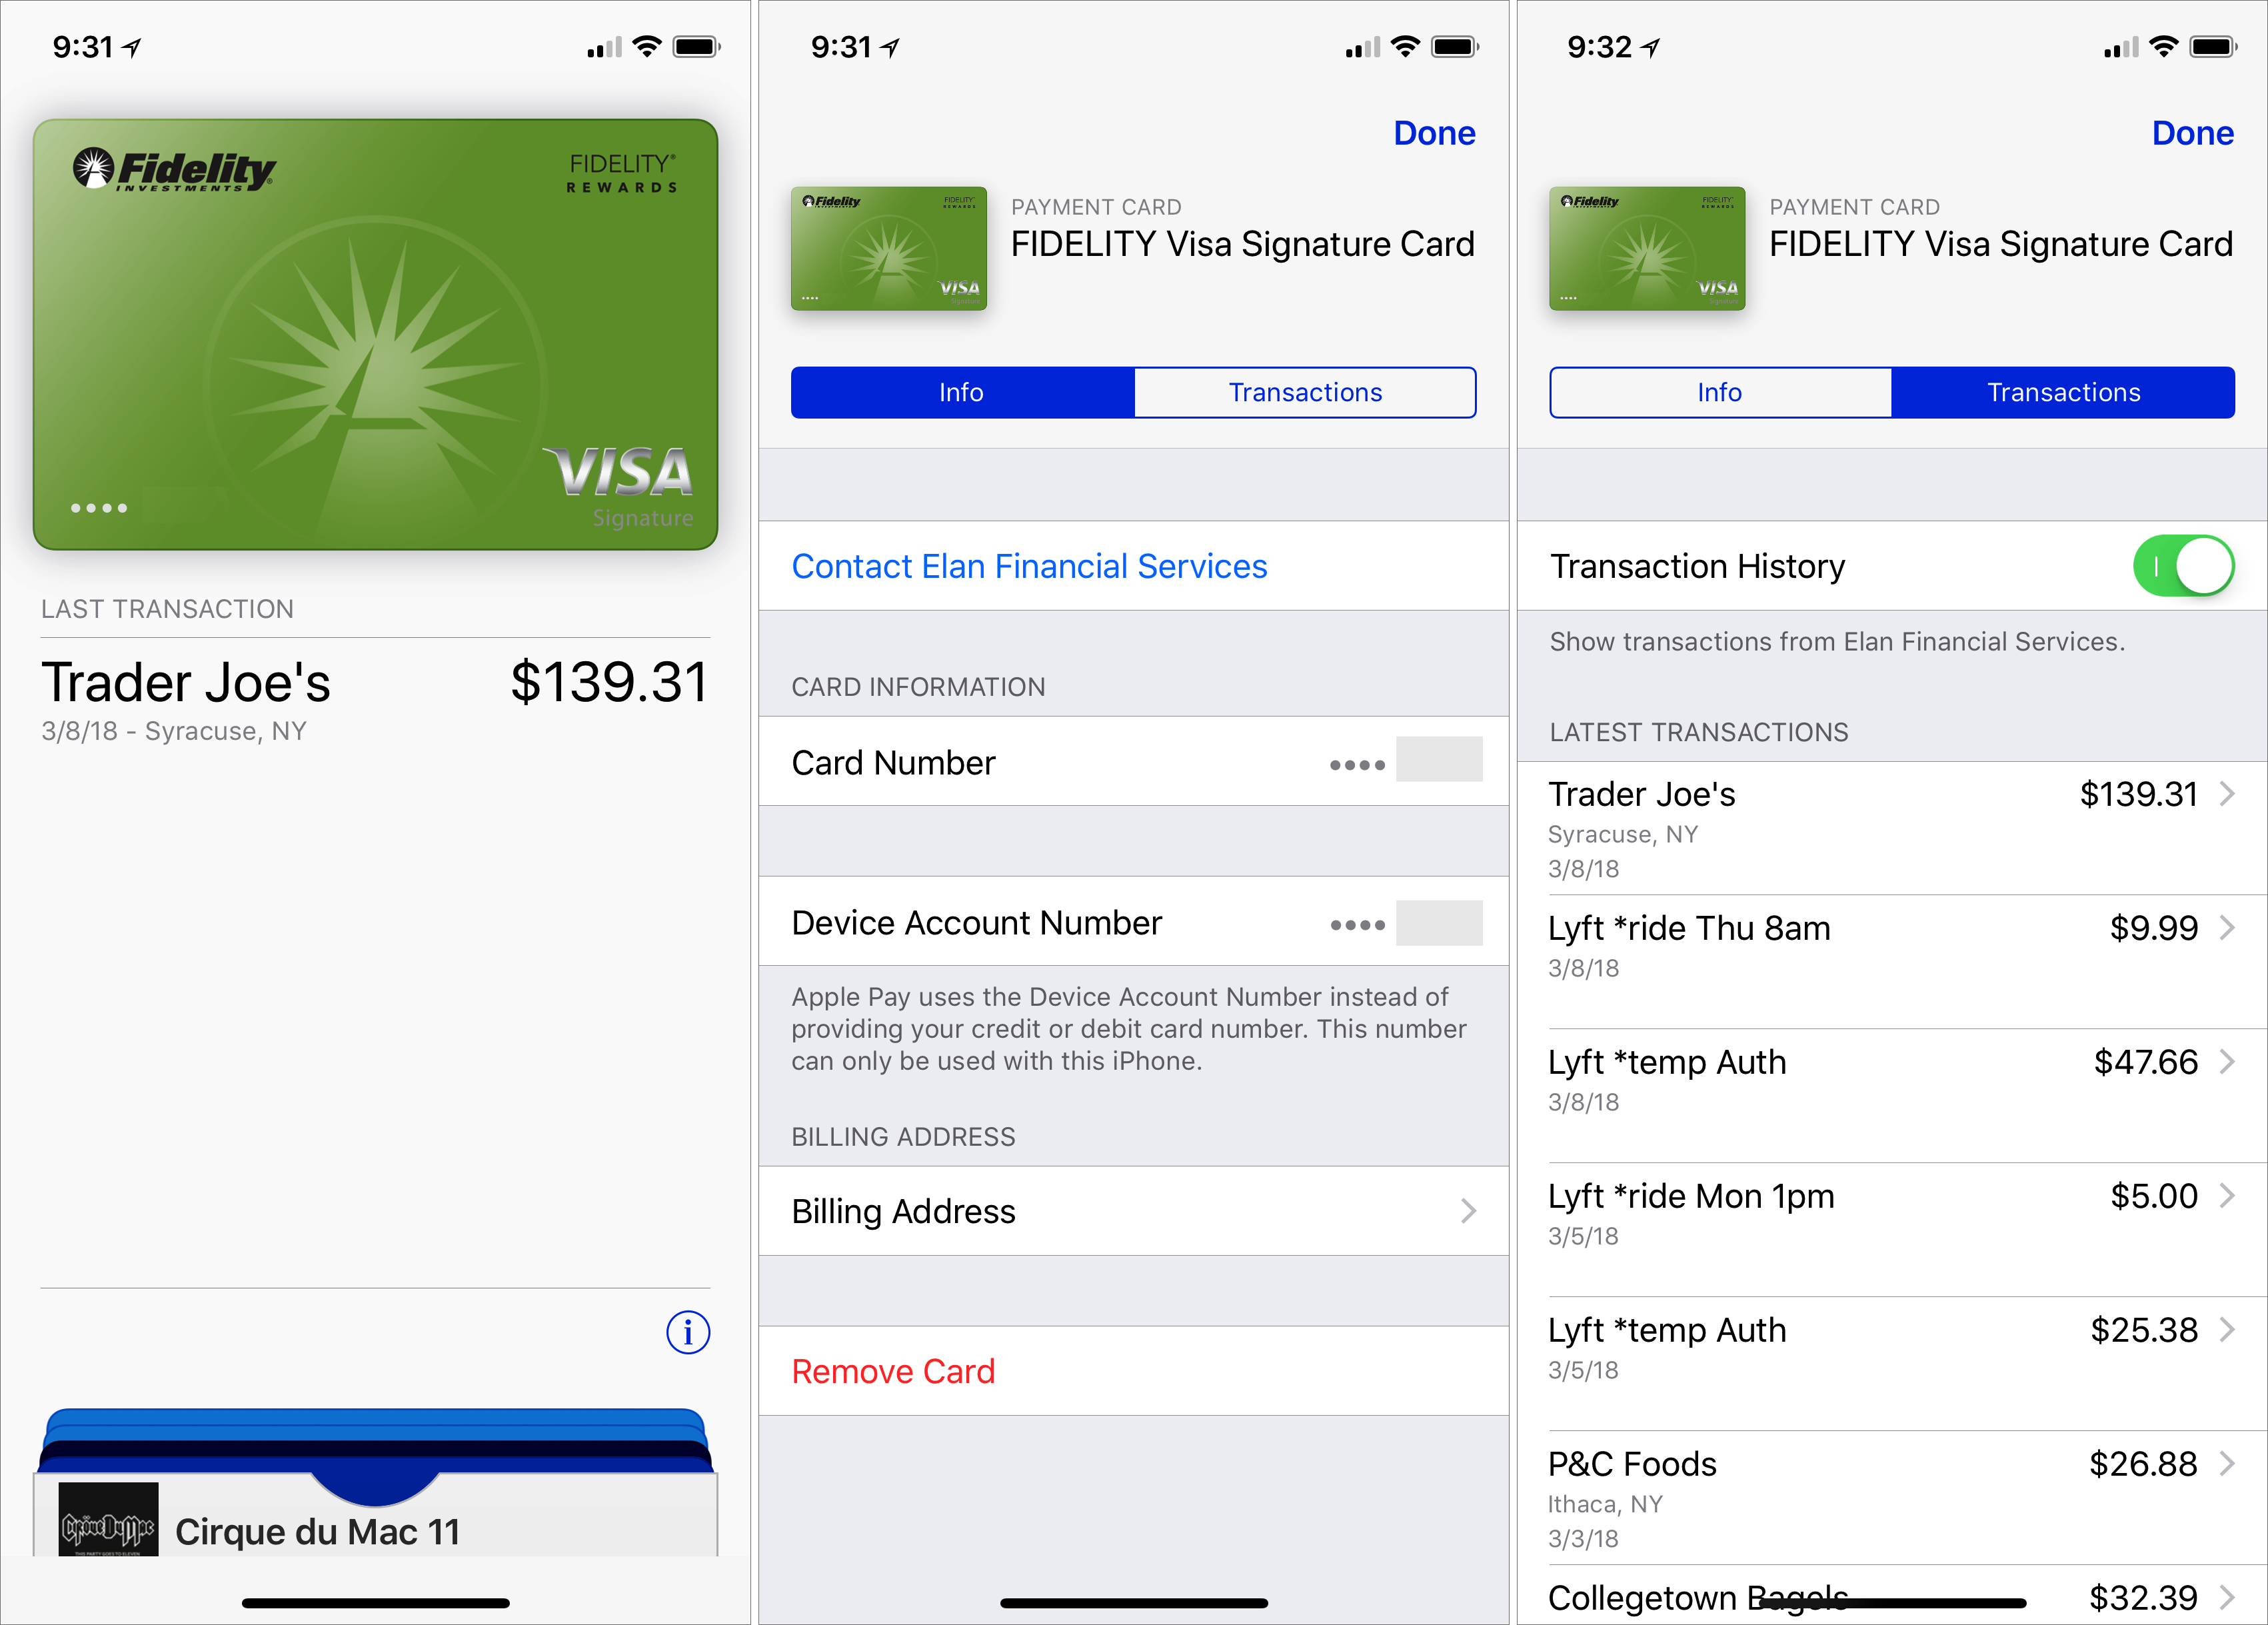
After adding a card, find it in the Wallet app and tap the card’s info button at the lower right to explore the Info and Transactions screens. Notice that four digits from the card’s Digital Account Number appear on the Info screen—if you want to return an Apple Pay purchase, you’ll give these digits to the merchant instead of sharing your credit card number.
Finally, starting in iOS 11.2, Apple introduced Apple Pay Cash, which lets you make person-to-person payments within the Messages app. It’s great for splitting restaurant checks!
The bottom line is that Apple Pay is easy to use, is completely private, and enhances your financial security. And you get to feel like you’re living in the future!


Friday, April 13, 2018

iOS 11.3 Introduces New Battery Health Feature, Business Chat, and More

At the end of March, Apple released updates to all four of its operating systems, but iOS 11.3 was the most notable. It boasts a variety of new features and other changes—you can think of it as the midpoint update between iOS 11’s first release and iOS 12, probably coming next September. All remaining updates to iOS 11 are likely to be minor maintenance updates. Here’s what’s new.

iPhone Battery Health

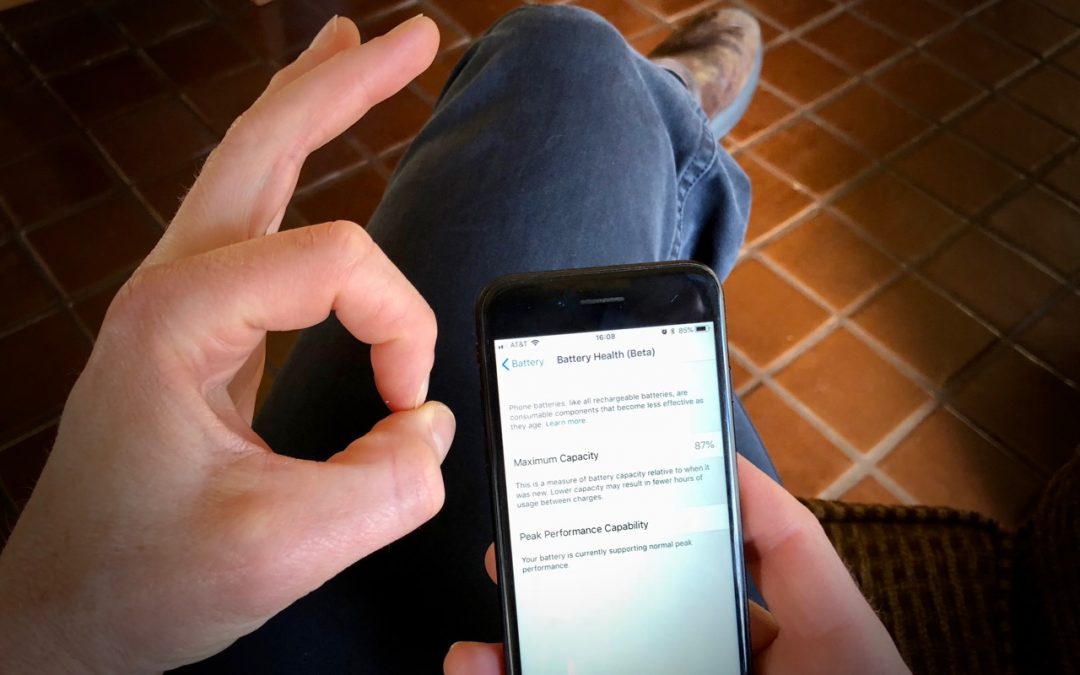
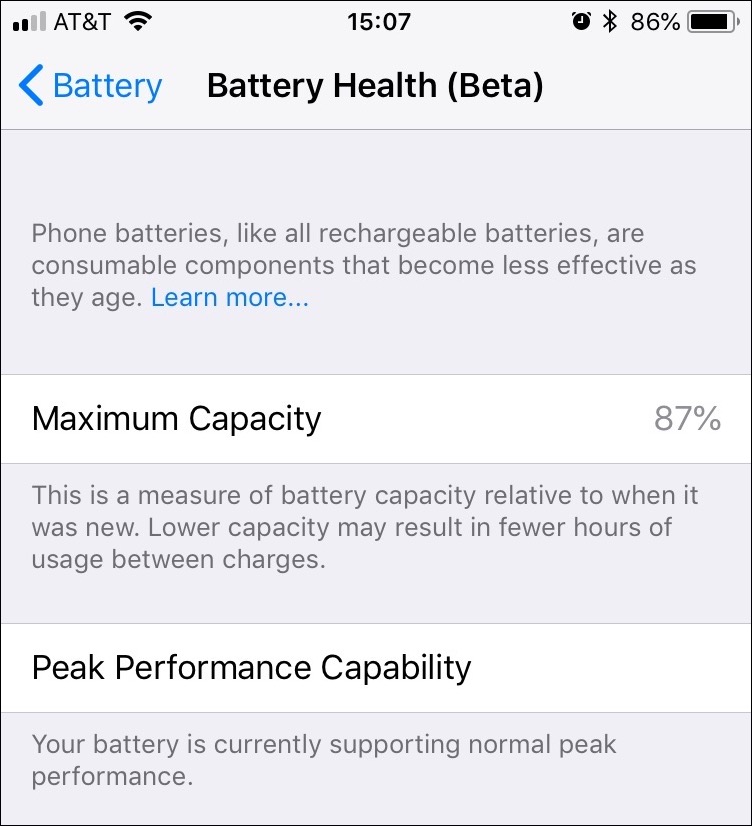
The most anticipated change is the Battery Health feature that Apple promised to add in the wake of revelations that the company was quietly reducing the performance of older iPhone models (starting with the iPhone 6) to lessen the chance of unexpected shutdowns with weak batteries. You find the new Battery Health screen in Settings > Battery > Battery Health, and Apple explains it in detail here.
If your iPhone battery is aging, you may see a lower maximum capacity, and if your iPhone has shut down because of a weak battery, the screen will tell you that performance management has been applied. You can disable performance management, if you prefer the iPhone shutting down to degraded performance, but it will turn on again the next time your iPhone shuts down. Finally, if your battery is bad enough, the screen will recommend replacement.
Also note that iPads running iOS 11.3 can better maintain battery health when they’re plugged into power for long periods of time. Be sure to upgrade if you have an iPad that stays plugged in all the time.

Business Chat

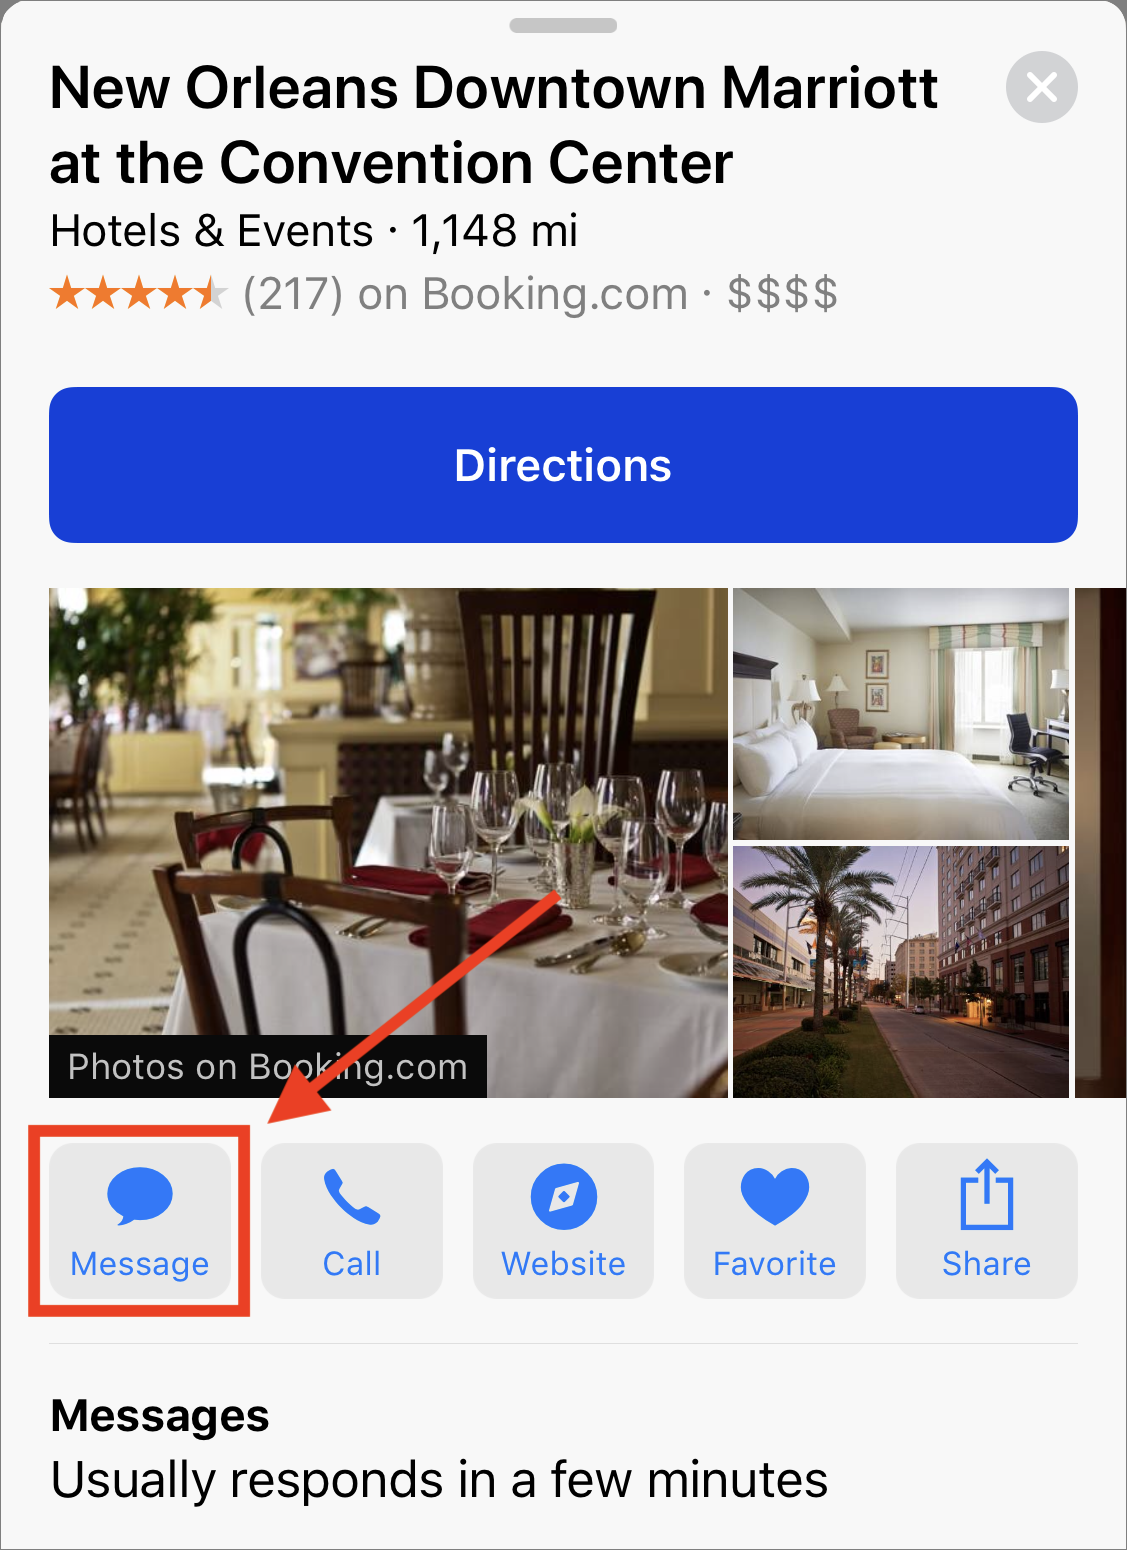
New in both iOS 11.3 and macOS 10.13.4 High Sierra is Business Chat, an Apple service that lets you chat with participating companies directly within Messages. If you look up one of these companies in Maps, Safari, or Search/Spotlight and see a Messages button, just use it to start a conversation. Only you can start conversations, and Business Chat can be a fast way to ask questions, get support, schedule appointments, and even make purchases using Apple Pay.
Apple’s launch partners are 1-800-Flowers, Ameritrade, Discover, Hilton, Home Depot, Lowe’s, Marriott, Newegg, and Wells Fargo, although not all of them seemed to be active out of the gate. And, of course, you can use Business Chat with Apple itself.

Health Records

Most people won’t be able to take advantage of iOS 11.3’s next new feature—medical records in the Health app—right away, but we have high hopes for it. Apple has partnered with over 40 healthcare systems to bring your medical records into the Health app, centralizing them and making them easier for both you and healthcare professionals to access. The records include lab results, medications, conditions, and more. Health Records data is encrypted and protected with a passcode so it remains private.

Data & Privacy

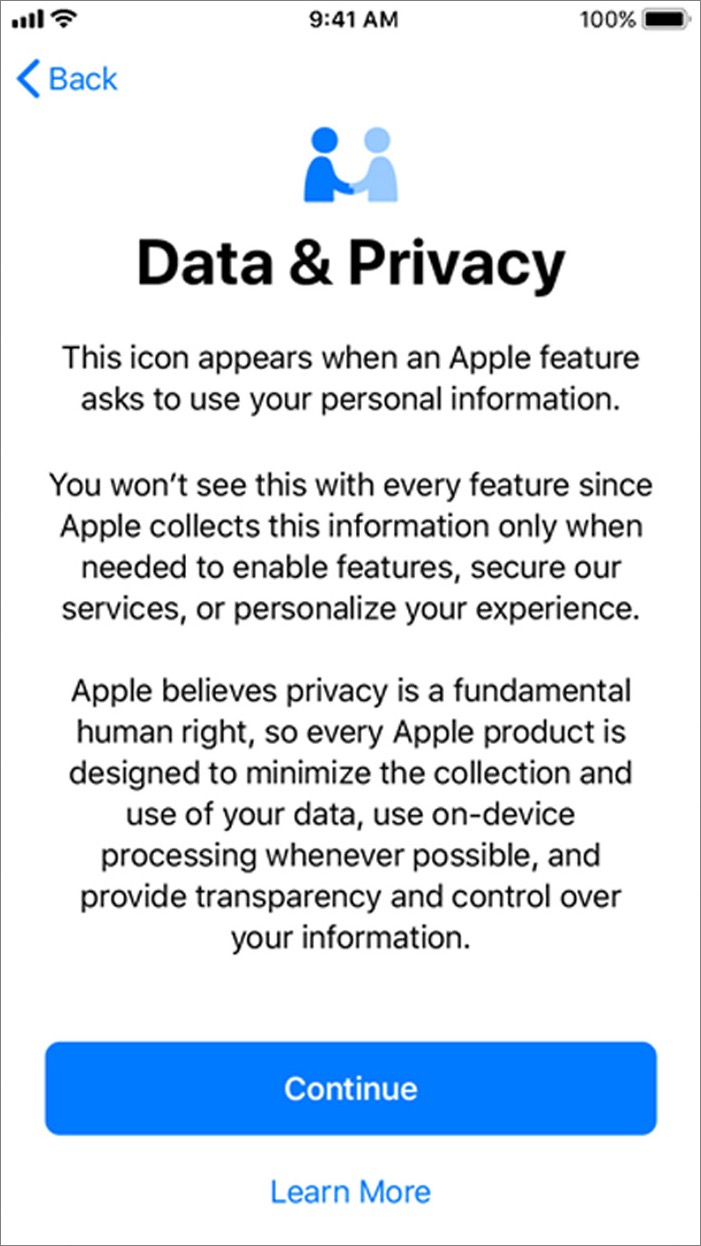
We haven’t yet seen this, but Apple says that iOS 11.3 (and macOS 10.13.4) will display a new privacy icon whenever Apple asks for access to personal information, as it might do to “enable features, secure Apple services or personalize an iOS experience.” The icon should be accompanied by detailed privacy information explaining the situation. In an era when every company seems hell-bent on collecting and exploiting our personal data, it’s nice to see Apple increasing the transparency of its data collection practices.

Safari

iOS 11.3 tweaks Safari in several small ways that make it easier to use and more secure:
  • Autofill now inserts usernames and passwords only after you select them on Web pages.
  • Autofill now works in Web views within other iOS apps.
  • Safari warns you when you interact with password or credit card forms on non-encrypted pages.
  • Safari now formats shared articles sent via Mail as though they were in Reader mode.
  • Favorites folders now show icons for the contained bookmarks.

Other Improvements

Apple made lots of other minor improvements in iOS 11.3. You can see a full list in the release notes, but those that we find most noteworthy include:
  • iPhone X users get access to four new animoji: a lion, dragon, skull, and bear.
  • iOS 11.3 adds support for the Advanced Mobile Location (AML) standard, which provides more accurate location data to emergency responders when Emergency SOS is triggered.
  • Podcasts now plays episodes with a single tap, and you can tap Details to learn more about episodes.
  • Apple Music now streams music videos uninterrupted by ads.
  • Apple News has improved its Top Stories feature and includes a new Video group in the For You collection.
iOS 11.3’s improvements may not change the way you use your iPhone or iPad, but they’re welcome nonetheless, and Business Chat and Health Records should become more interesting as additional institutions sign on. And, of course, anyone with an older iPhone should check the Battery Health screen right away. You can even use CoconutBattery on your Mac to check the iPhone battery for more information. 


Thursday, April 12, 2018

Quick Tip - Need to Do Some Simple Math? Get Siri to Do It!

If you’re reading this, chances are good that you’re not in elementary school, but it’s still easy to end up with a bunch of numbers you need to calculate. Perhaps you’re trying to total receipts for an expense report, average your kid’s report card grades, or split a restaurant bill. Either way, instead of launching the Calculator app on your iPhone (it’s oddly missing from the iPad), get Siri to do the math for you. 
For each the above examples, try the following, making sure to speak the decimal point as “point” or “dot.” “What is 113.25 plus 67.29 plus 89.16?” “What is the average of 92 and 96 and 82 and 91?” “What is 235.79 divided by 6?” Siri always shows you the calculation, so you can verify that it heard you correctly, just in case you’re doing this in a loud restaurant. Try it!

Wednesday, April 11, 2018

Here’s How to Lock Down Your Facebook Privacy Settings—to the Extent Possible

Facebook has dominated the news headlines of late, but not for good reasons. There were the 50 million Facebook profiles gathered for Cambridge Analytica and used in the 2016 presidential election. Facebook has long been scraping call and text message data from Android phones. And within the Facebook iOS app, the company pushes the Onavo Protect VPN, an app made by a subsidiary that literally collects all your mobile data traffic for Facebook.
Because of this, many have encouraged Facebook users to delete their accounts. That even includes the billionaire co-founder of the WhatsApp messaging service, which Facebook bought in 2014. If you’re done with Facebook, you’re welcome to deactivate or even delete your account. Facebook provides instructions for both actions. Deactivating your account basically just makes you invisible on Facebook, whereas deleting your account may eventually (up to 3 months) result in most of the data being removed.
The problem is that Facebook is useful. It may be the only connection you have with certain friends or family members, and many informal groups use Facebook for meetup logistics. For many of us, losing access to Facebook would hurt our real-world relationships and activities. Plus, lots of companies have Facebook pages, and taking those down might result in a loss of business from customers who would find out about the firm only through Facebook. What to do?
If you’re a business, the most sensible tack is to keep your Facebook page but avoid relying on it. Remember, Facebook is not your friend. Earlier in 2018, Facebook announced that it would be prioritizing posts from friends and family over public content, which is a nice way of saying that Facebook is deprecating business-related posts. So make sure you have a Web site that you control, and make sure that customers can easily find it and contact you through it. It’s also a good idea to offer customers multiple ways to contact you, including via email.
On a personal level, there are two ways to think about privacy on Facebook: limiting the information you share with other people on Facebook, and limiting the information that you’re willing to provide to Facebook at all. If Facebook doesn’t have certain data about you, they can’t sell it to the highest bidder, let it be harvested by hackers, or use it in ways you might find creepy.
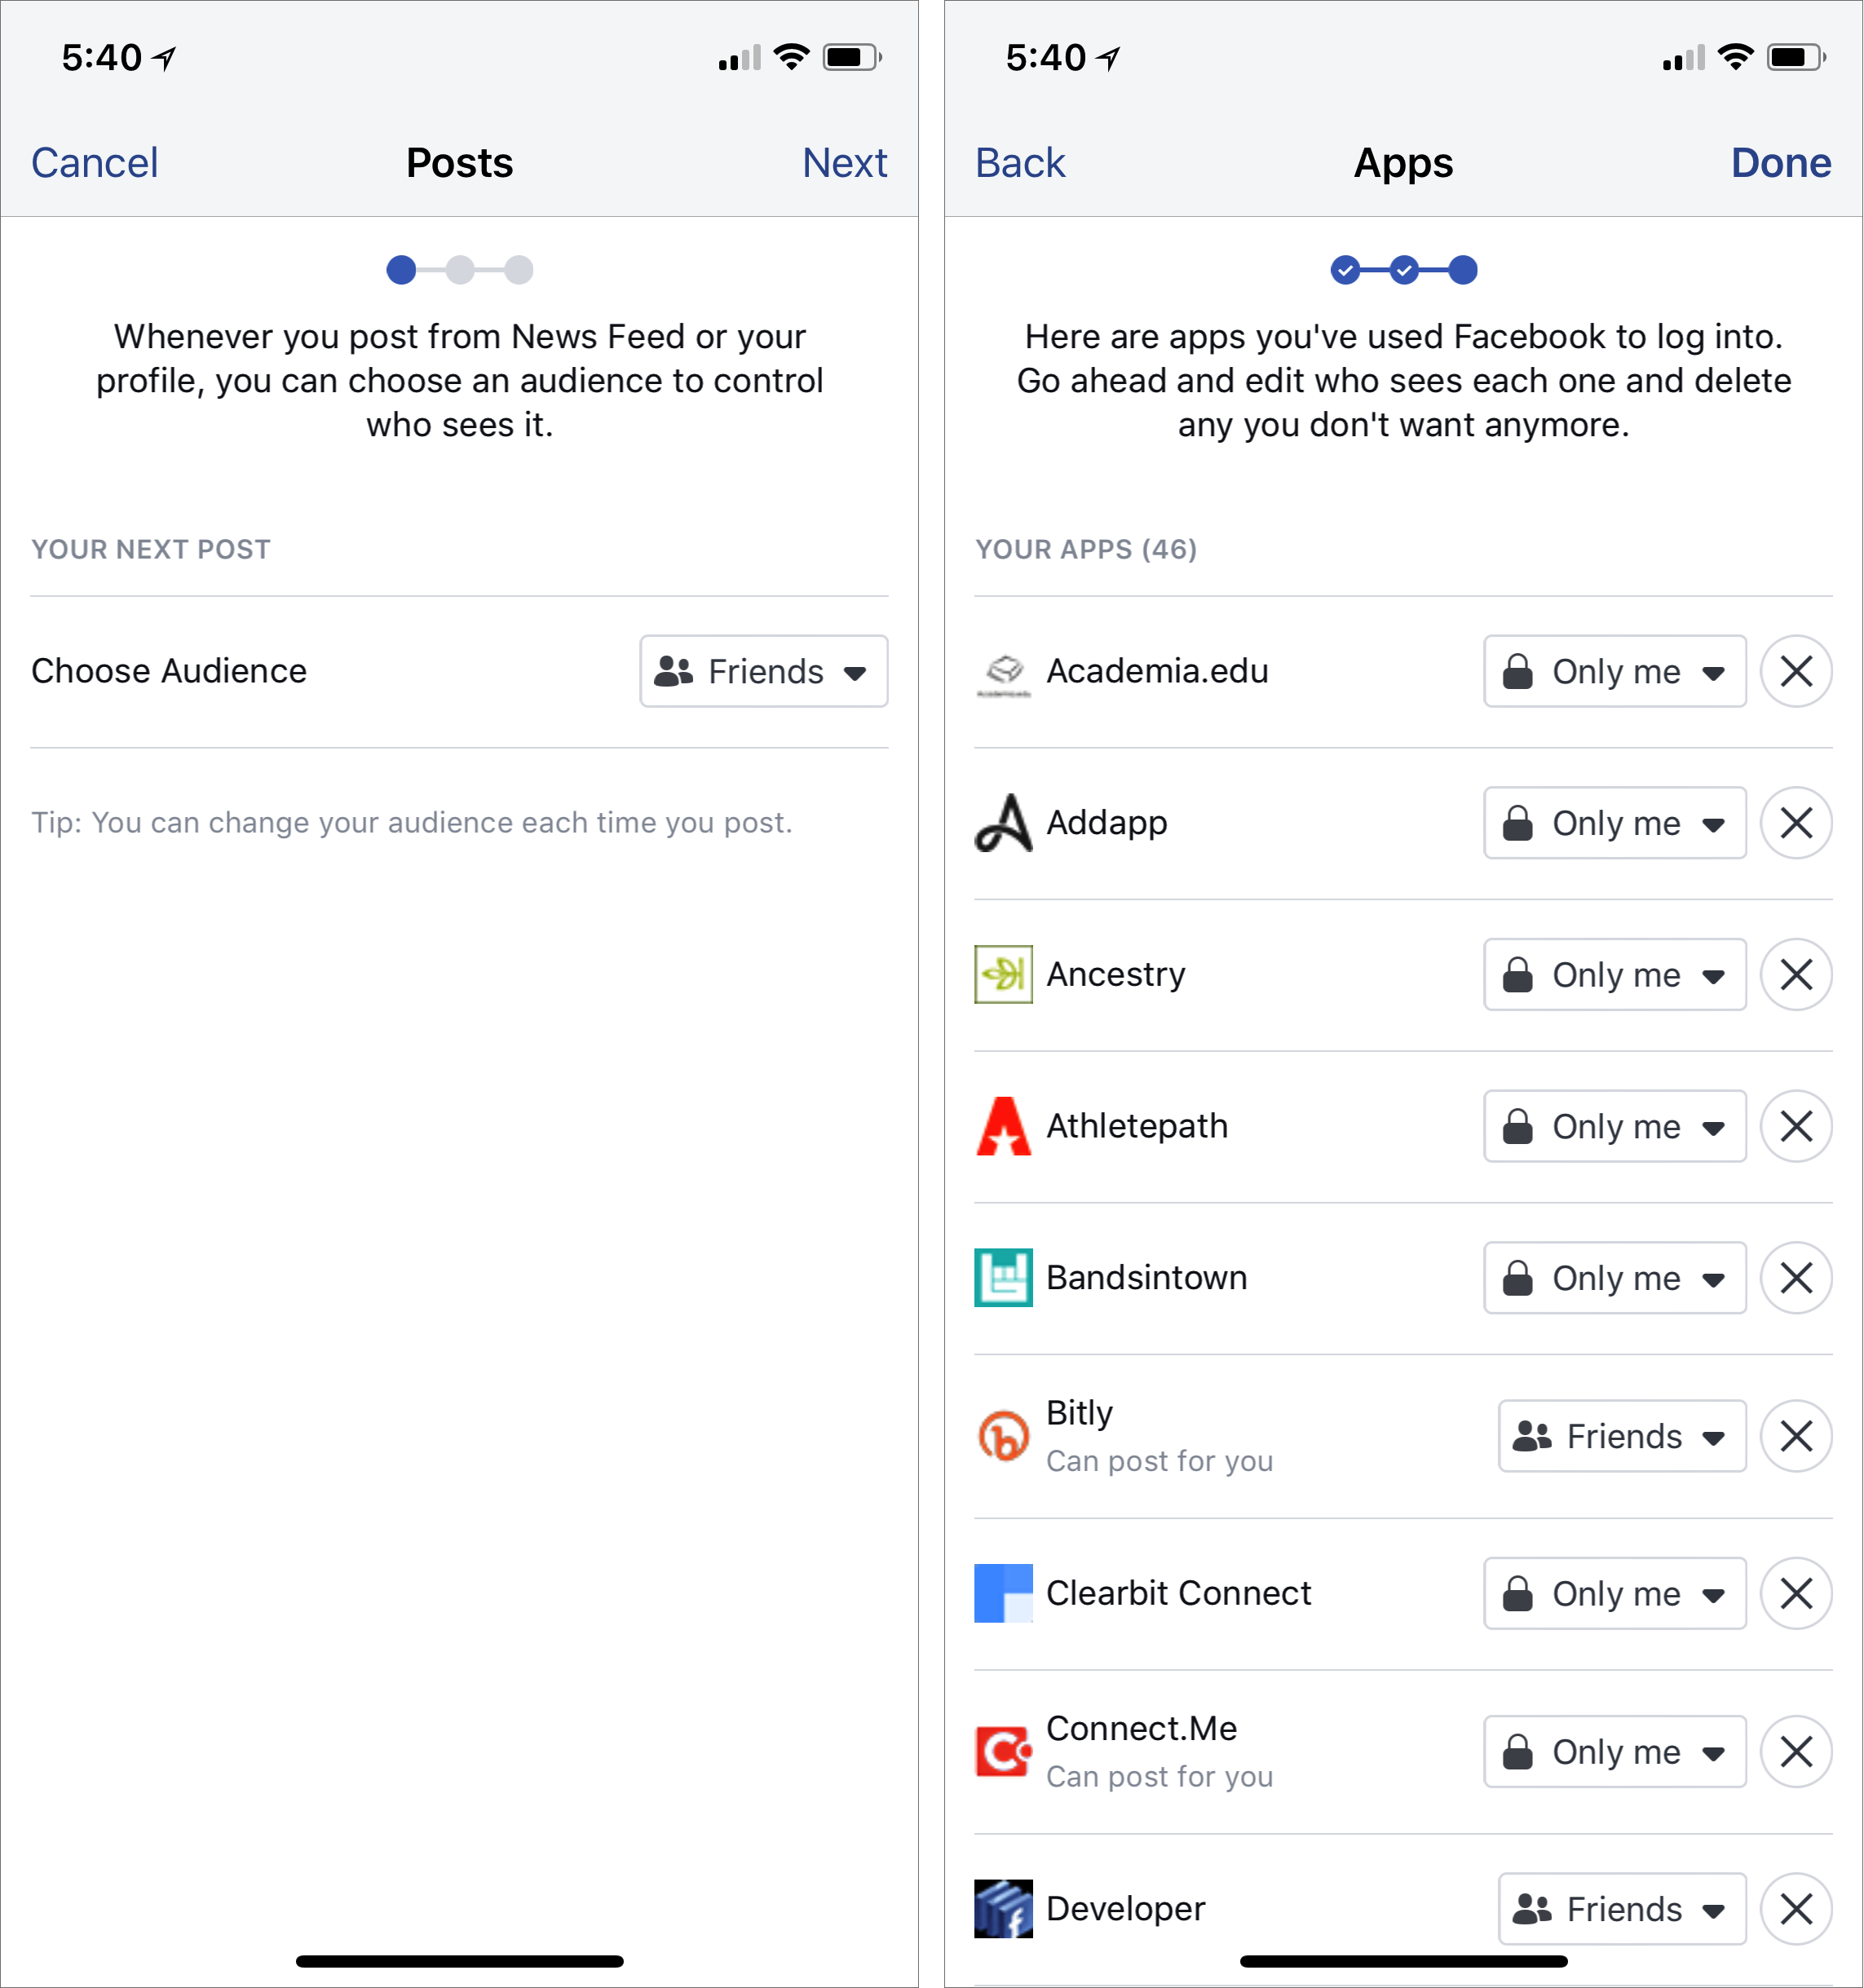
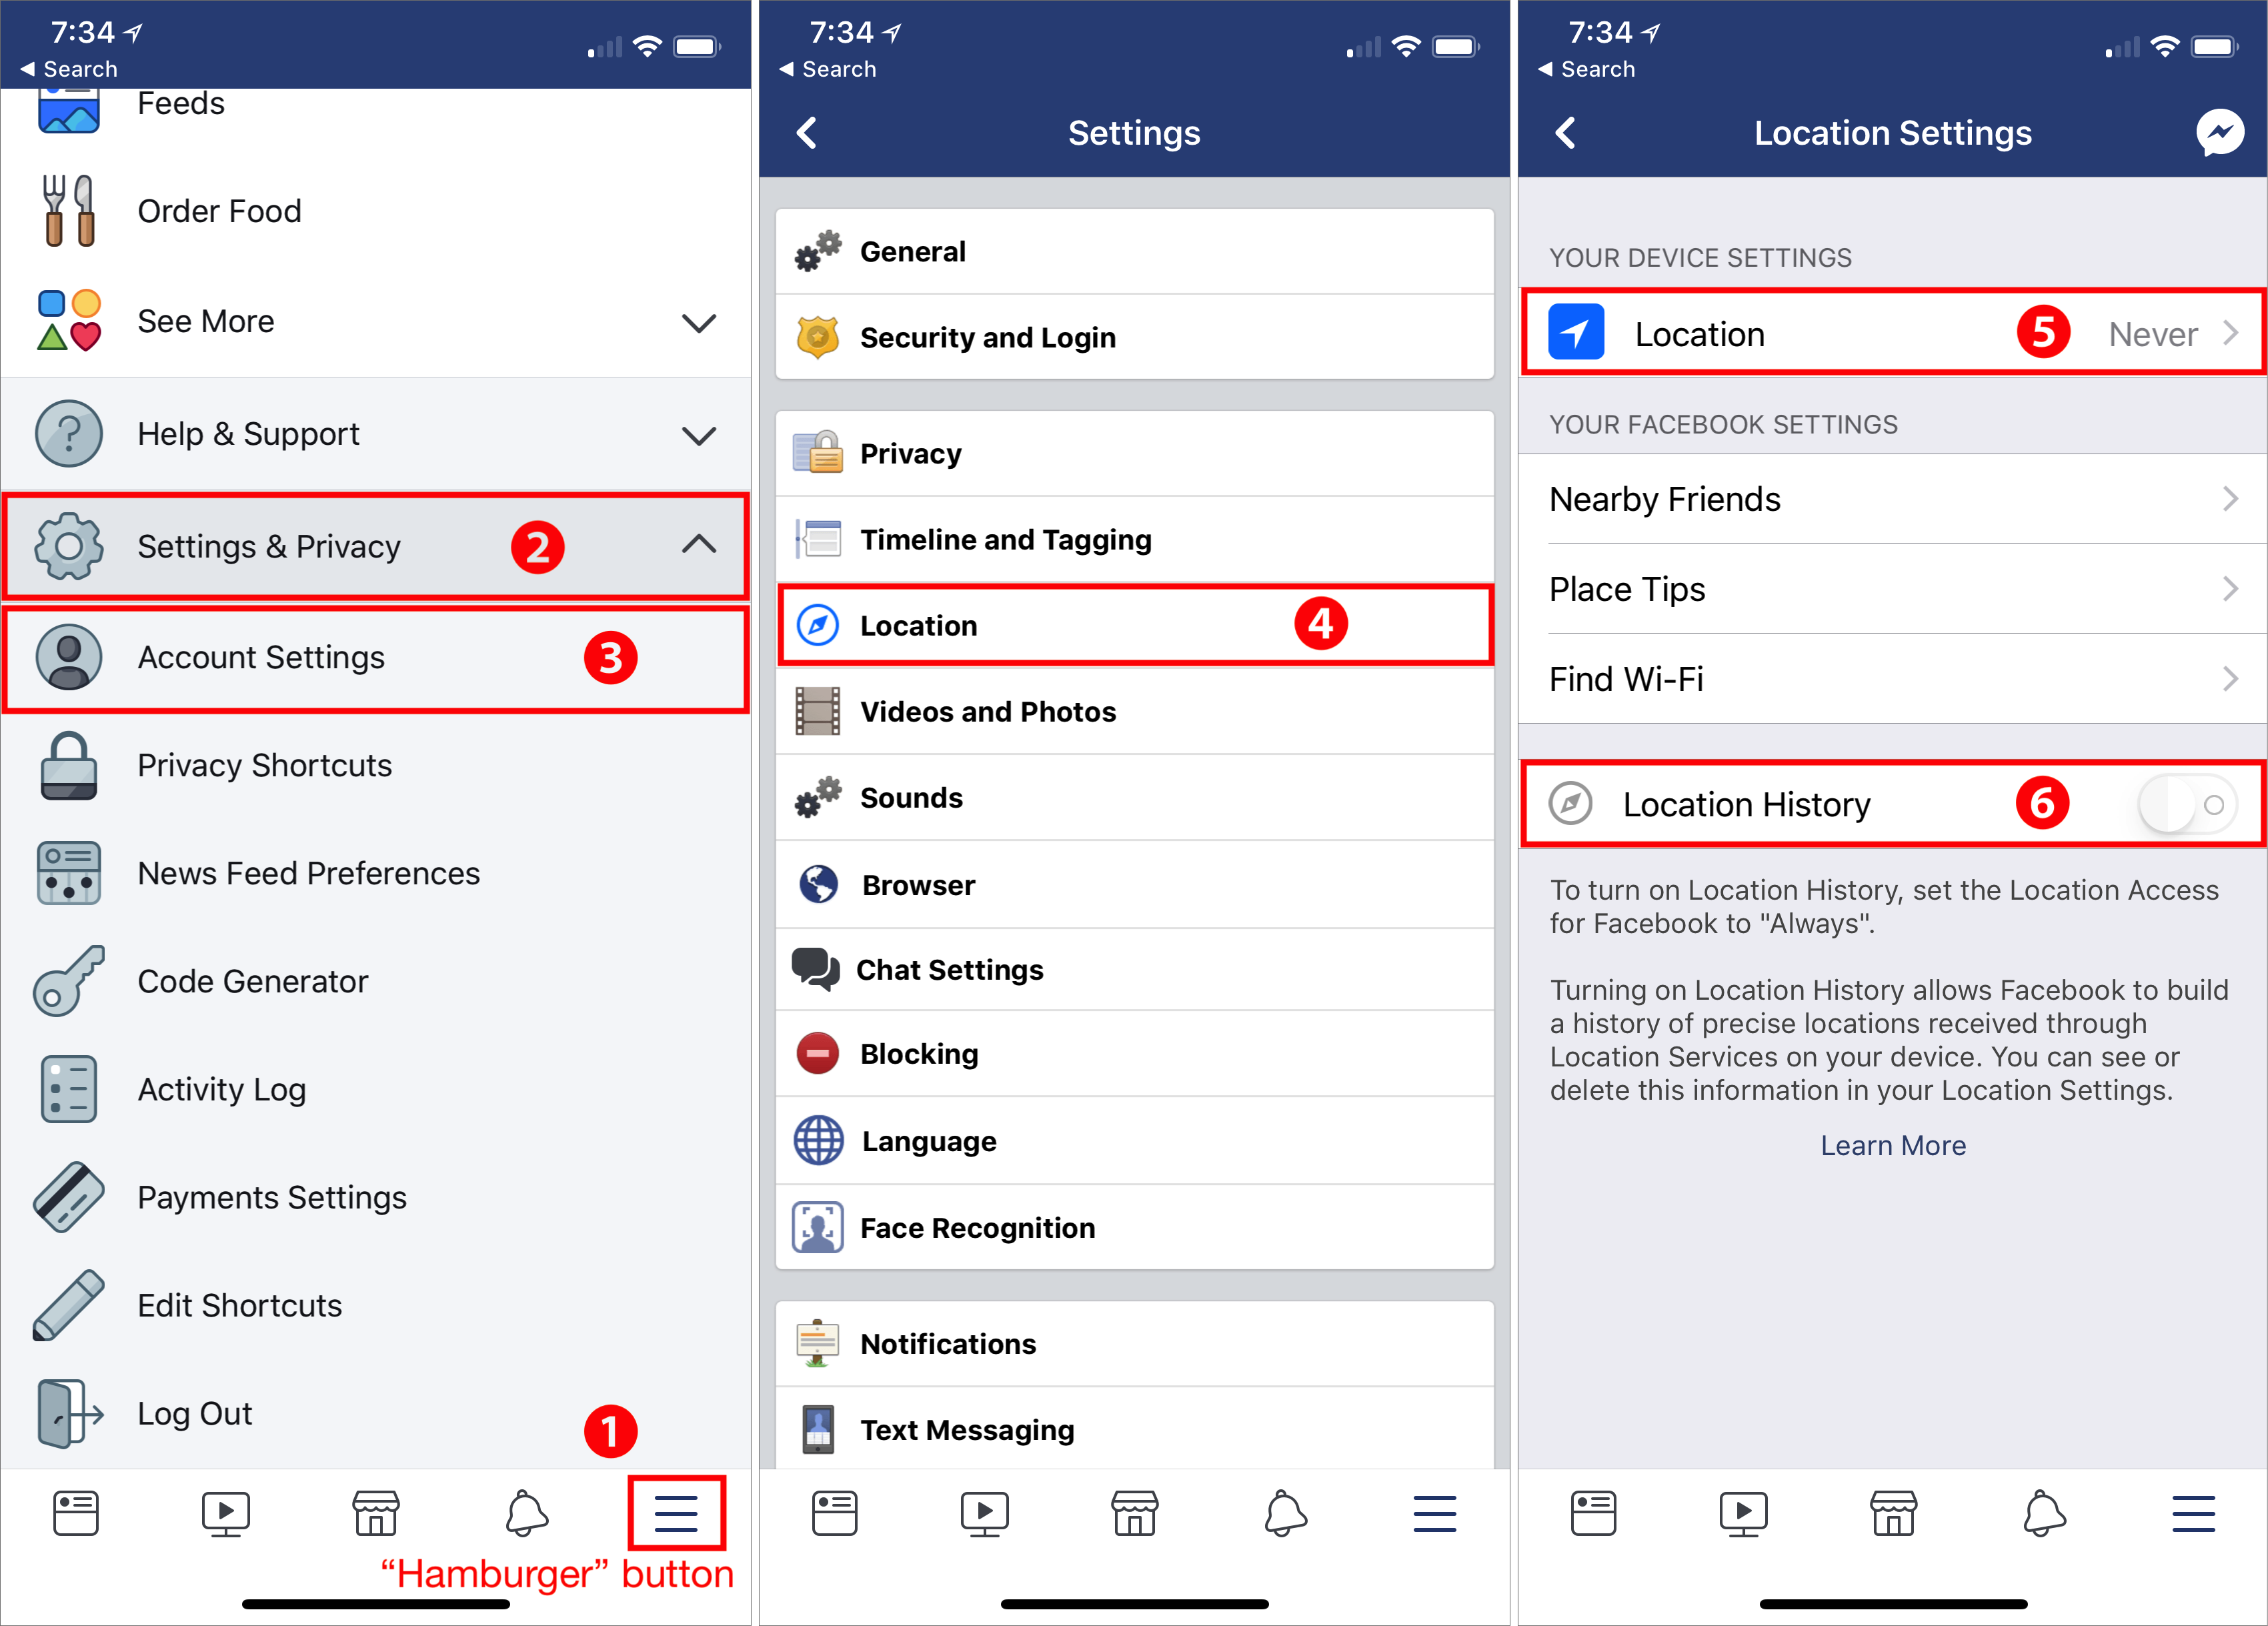
To control who on Facebook can see what you share, click the ? button on the Facebook Web site on your Mac, or tap the hamburger button in the bottom right corner of the Facebook iOS app and tap Privacy Shortcuts. Then click or tap Privacy Checkup and run through the steps to make sure you’re sharing the right info with the right people. Be sure to lock down or remove any apps that you don’t need, since they can leak all sorts of data.
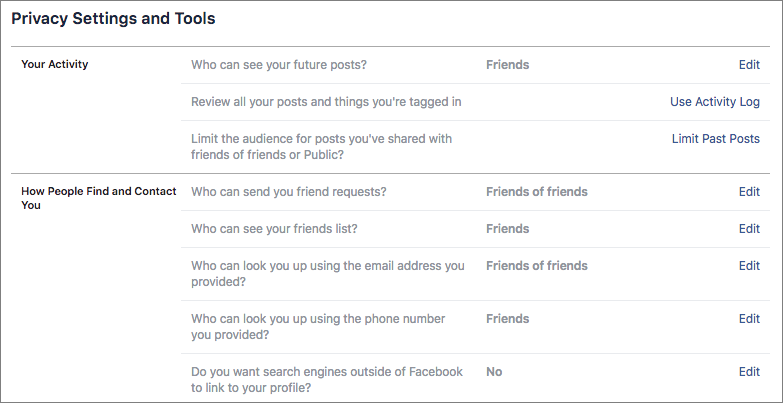
Also, go to Facebook’s Privacy Settings & Tools page. Click the Edit button next to each item, and make it as specific as you can. You also might want to review the posts you’re tagged in and remove those that you don’t want on your timeline.
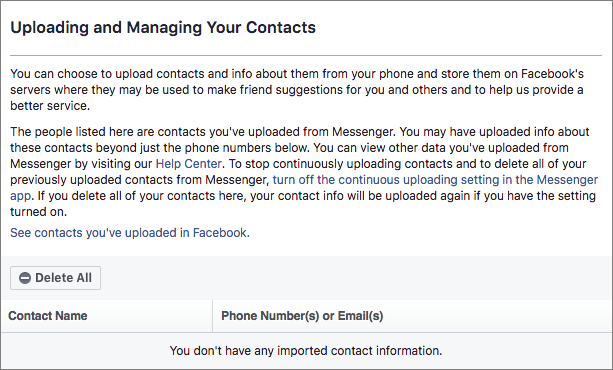
But what if you don’t want to give information to Facebook for it to use? Go to Facebook’s page for Uploading and Managing Your Contacts, and delete them all. You’re just giving away your contacts’ personal information without their permission otherwise.
To ensure that contact uploading doesn’t happen again, in the Facebook iOS app, tap the hamburger button, scroll to the bottom, and then tap Settings & Privacy > Account Settings > General > Upload Contacts and make sure the switch is off. (Some versions of the Facebook app just have Settings, not Settings & Privacy, and show a popover for Account Settings.)
Also, in the iPhone Facebook app, tap the hamburger button again and then Settings & Privacy > Account Settings > Location > Location, and make sure it’s set to Never. And whatever you do, keep Location History off—Facebook doesn’t need to know everywhere you’ve ever been.
If you’re perturbed by the way Facebook’s iOS app is trying to capture your contacts and locations, you could delete it from your iOS devices and rely instead on the Facebook Web site, which can’t access nearly as much information about you. To make it easier to open, in Safari, visit facebook.com, tap the Share button, and then tap the Add to Home Screen button in the bottom row of the share sheet.
Let me leave you with one thought. Always assume that anything you post to Facebook or allow Facebook to have access to could end up on the front page of your local newspaper… or the New York Times. Nothing on Facebook is ever completely private—Facebook has shown it isn’t trustworthy or reliable—and the best way to ensure confidential information doesn’t leak inadvertently is to avoid posting it to Facebook in the first place.


Thursday, March 22, 2018

Apple’s Family Sharing Simplifies Sharing Purchases and Managing Kid Capabilities

Family life is all about togetherness, but keeping track of who’s doing what when can be tough. Apple’s Family Sharing service makes it easy to share apps, media, and more within a family of up to six members, and it provides a few helpful digital housekeeping capabilities, such as locating your kid’s misplaced iPad. Here’s an overview of how Family Sharing can enhance your family’s everyday life, both online and in the real world.

Manage Your Kids’ Purchases

Every Family Sharing group has an organizer. That person (probably you) sets up the family on a Mac in System Preferences > iCloud and connects a credit card to the account to pay for all App Store, iTunes Store, and iBooks Store purchases of apps, music, TV shows, videos, and ebooks.
For any child under the age of 18 in the group, you can turn on Ask to Buy. This feature lets your kid shop for apps or media, but complete a purchase only if you approve it. Ask to Buy also applies to free downloads so you can maintain control over free games. You can give other adults in your family the ability to approve Ask to Buy requests.

Share Apps, Media, and More

To help you keep costs down, once someone in the family has purchased an app or media file, anyone else in the family can download it. Keep in mind that some apps don’t allow such sharing and in-app purchases can’t be shared. Helpfully, you can hide some or all purchases from other family members.
You can also buy a family subscription to Apple Music, Apple’s streaming music service. At $14.99 per month for a family instead of $9.99 per person, it’s a good deal.
Family Sharing creates a few items that all group members can access on their Apple devices:
  • A shared Family album appears in the Photos app, making it easy to build a common set of photos. You can designate the Family album as a screensaver on your Mac or Apple TV.
  • A shared Family calendar in the Calendar app helps track those basketball games and piano recitals that everyone needs to know about.
  • A shared Family list in the Reminders app has many possible uses, such as a grocery list with location-based alerts or a chore list with timed alerts.

Find Your Children (and Their Devices)

Family Sharing simplifies the setup and usage of two key Apple services related to finding things.
All family members automatically become “friends” in Apple’s Find My Friends app. This bundled app shows where everyone is on a map (more specifically, it shows where their primary device is). We find this feature helpful for determining when someone is likely to be home for dinner or for a teenager to see that a parent is en route to a pickup. If you need privacy briefly, you can temporarily stop sharing your location.
You won’t need the Find My iPhone app—which shows the location of all your family’s Apple devices, including the tiny AirPods—on a daily basis. But when your tween isn’t sure whether he dropped his iPhone on the bus or in the museum, it’s a godsend. You can also use Find My iPhone to play a sound on a missing device (in case it’s in the couch), put a message on it, or even erase the device entirely.
Family Sharing may not do everything you’d want, like share entire Photos libraries or contact lists, but it’s a boon for any household whose members use a variety of Apple devices.


Friday, March 16, 2018

Quick Tip - Don’t Use These Products to Clean Your iPhone (Or You’ll Wish You Hadn’t)

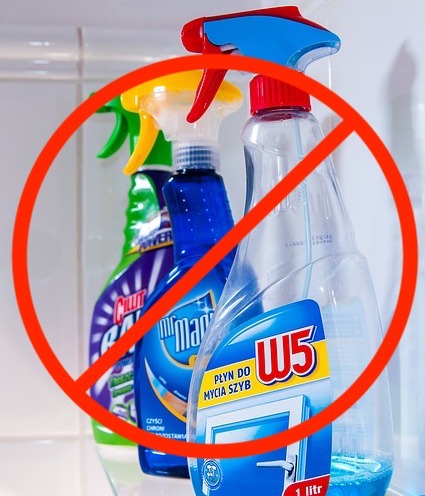
All iPhones pick up fingerprints, and it’s all too easy to get your iPhone dirty with ink, lotion, makeup, dirt, food, and oil. If you’re faced with an iPhone that needs cleaning, resist the urge to spray it with window cleaner, rubbing alcohol, or ammonia, or, even worse, to scrub it with baking soda or Borax. 

That’s because all iPhones have oleophobic—oil repellent—coatings on their glass surfaces that make it easy to wipe off fingerprints. You don’t want to remove that coating any faster than it will wear off normally, and cleaning products will strip it quickly. Instead, Apple recommends a soft, lint-free cloth such as you would use for glasses or camera lenses. You can even save over $18 and get a 6 pack from Amazon for less than $6 here.

By the way, even though the iPhone 7 and later have some level of dust and water resistance, it’s important to avoid getting moisture in the openings—most of the time, a lens cloth should be all you need. 

Wednesday, March 14, 2018

Block Telemarketing Calls Automatically on Your iPhone

Junk calls are one of the great annoyances of the modern world. You’re minding your own business when your iPhone vibrates in your pocket. You pull it out, curious as to who’s calling, but don’t recognize the number. You may notice that it’s in the same exchange as your phone number, suggesting that it’s a neighbor. But no. When you answer, it’s “Heather,” a pre-recorded voice wanting to sign you up for a resort vacation, give your business a loan, or help with your credit card debt. Angered by the intrusion, you tap the red hangup button, wishing you had an old-style telephone receiver to slam down.
There’s no way to retaliate against these scum-sucking bottom feeders, and the best option is to hang up immediately. For quite a few versions of iOS, you’ve been able to block a caller manually—just tap the i button next to the call in the Recents screen in the Phone app, scroll to the bottom, and tap Block This Caller. But that’s seldom worth doing since telemarketers often spoof the numbers they call from, so it’s unlikely you’d get a second call from the same number.
Instead, I recommend taking advantage of a feature Apple introduced in iOS 10 that enables apps to block calls for you. Quite a few of these apps have appeared, with some of the best reviewed being Nomoro, HiyaMr. NumberRoboKiller, and Truecaller. Hiya and Mr. Number are both free and from the same company—Mr. Number is a stripped-down version of Hiya—whereas RoboKiller and Truecaller require an in-app purchase for a monthly membership. I, personally use Nomorobo, and have for both my home phone, and IOS phone. If your on AT&T you can also get "Call Protect" which is free and actually an AT&T branded version of Hiya.
In general, these apps work by receiving caller ID information from iOS and comparing it against both your local contacts (to identify good calls) and a constantly updated database of numbers used by telemarketers (bad calls). Calls from your contacts ring through normally, as do calls from phone numbers not in either of those sets. That’s key, since your doctor might call back from a secondary number, or your kid’s new teacher might call to talk about an upcoming snack day. But if you receive a call from a number known to be used by a telemarketer, the app can either identify it on the incoming call screen or block it automatically, sending it to voicemail.
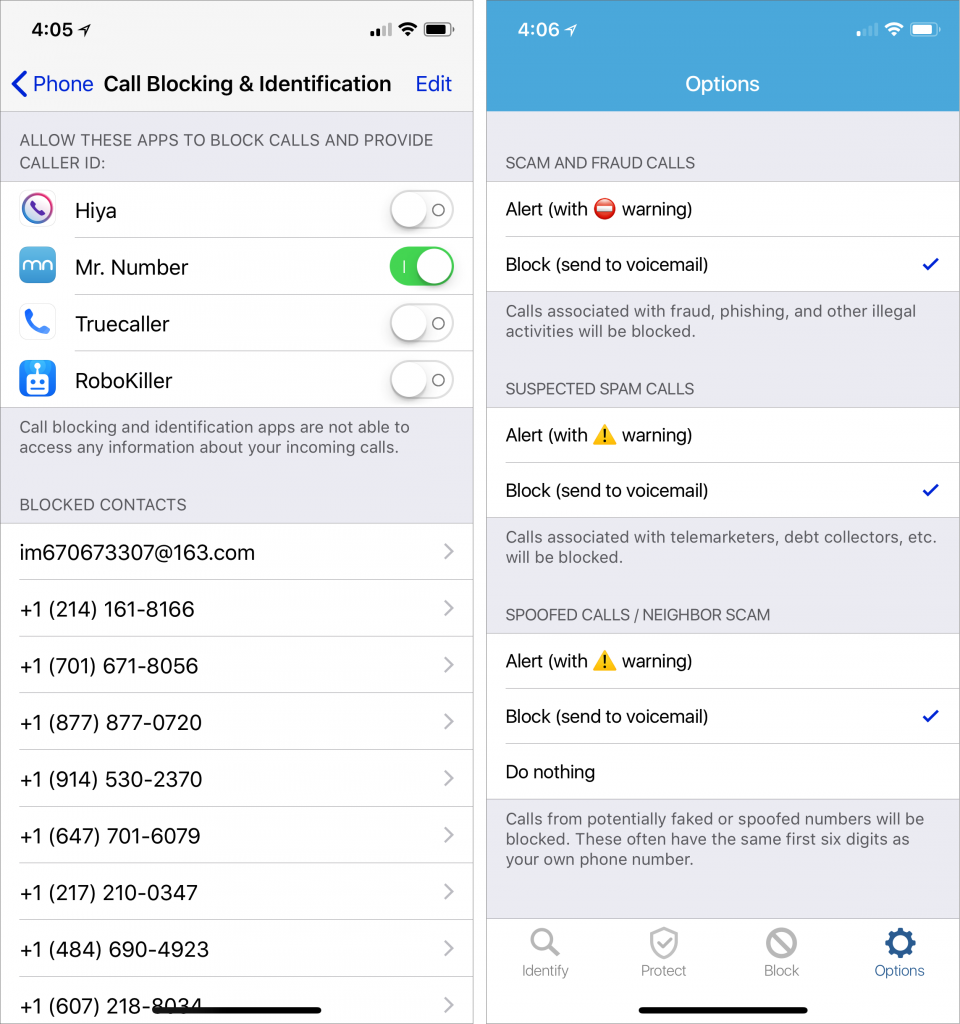
To enable one of these apps, after you download it from the App Store, go to Settings > Phone > Call Blocking & Identification and enable its switch. You’ll probably also have to do some setup in the app itself, providing your phone number, perhaps creating an account, and determining what should happen with different calls (Mr. Number is shown below, right).
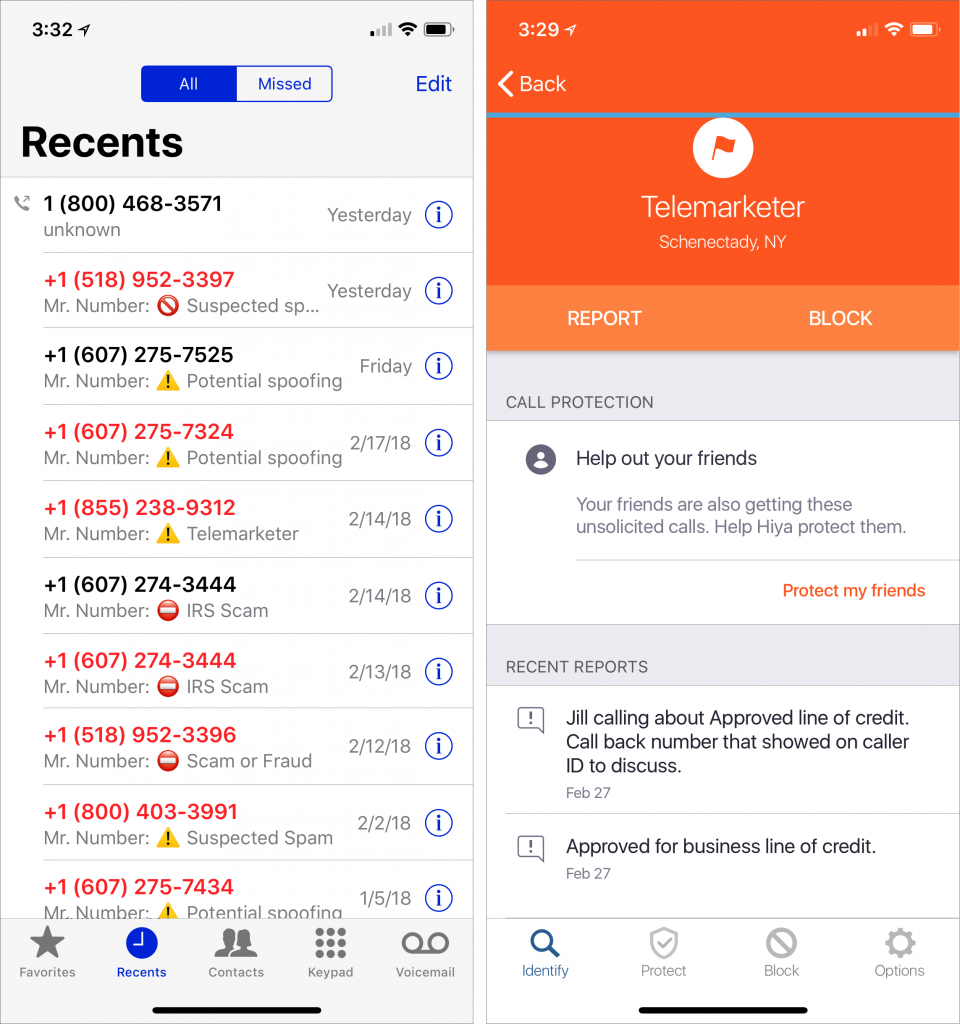
With Hiya and Mr. Number, you can copy a number from the Phone app’s Recents screen (tap the i button for a call, and then press the number to access a Copy button) and then look it up to learn more and see comments other users have made. And if you get a telemarketing call from a number that the app doesn’t recognize, you can submit it to protect others.
RoboKiller claims that it wastes the telemarketers’ time by playing pre-recorded “Answer Bots” conversations to keep them on the line, preventing them from calling more people.
Details vary by app, but the only real downside to using one of these apps is that it may ask for information about you or your contacts to improve its services. If that feels intrusive, investigate one of the apps that requires a membership, like RoboKiller, to see if it better answers your concerns.
In the end, it comes down to how many telemarketing calls you receive each day, week, or month. If you’re lucky and get only one or two per month, it’s probably not worth messing with a call blocking app—maybe just send unidentified (and unexpected) calls to voicemail. But if you’re interrupted by multiple junk calls per day or week, give one of these apps a try and let it reduce the onslaught.