Showing posts with label iPhone. Show all posts

Friday, March 16, 2018

Quick Tip - Don’t Use These Products to Clean Your iPhone (Or You’ll Wish You Hadn’t)

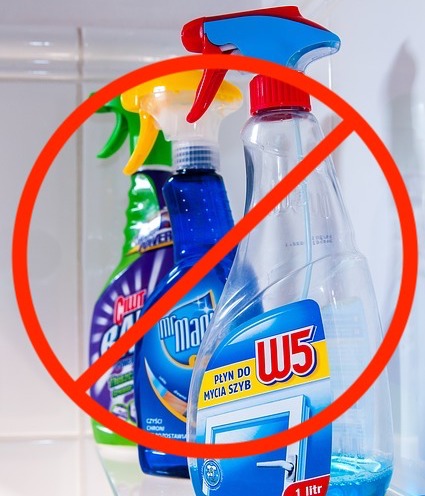
All iPhones pick up fingerprints, and it’s all too easy to get your iPhone dirty with ink, lotion, makeup, dirt, food, and oil. If you’re faced with an iPhone that needs cleaning, resist the urge to spray it with window cleaner, rubbing alcohol, or ammonia, or, even worse, to scrub it with baking soda or Borax. 

That’s because all iPhones have oleophobic—oil repellent—coatings on their glass surfaces that make it easy to wipe off fingerprints. You don’t want to remove that coating any faster than it will wear off normally, and cleaning products will strip it quickly. Instead, Apple recommends a soft, lint-free cloth such as you would use for glasses or camera lenses. You can even save over $18 and get a 6 pack from Amazon for less than $6 here.

By the way, even though the iPhone 7 and later have some level of dust and water resistance, it’s important to avoid getting moisture in the openings—most of the time, a lens cloth should be all you need. 

Wednesday, March 14, 2018

Block Telemarketing Calls Automatically on Your iPhone

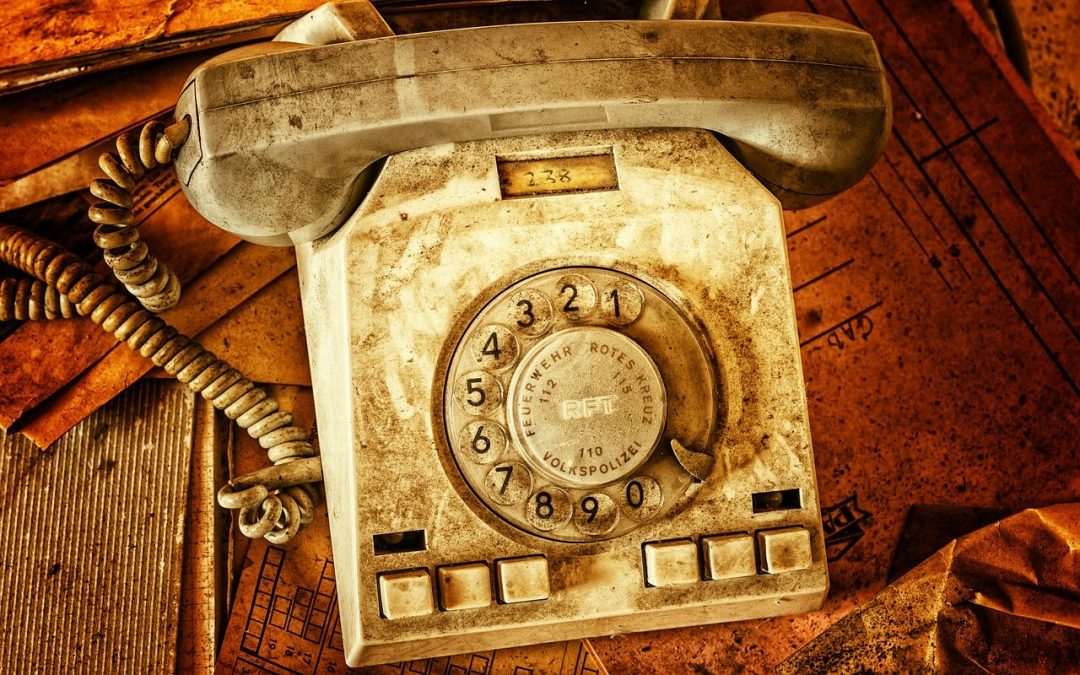
Junk calls are one of the great annoyances of the modern world. You’re minding your own business when your iPhone vibrates in your pocket. You pull it out, curious as to who’s calling, but don’t recognize the number. You may notice that it’s in the same exchange as your phone number, suggesting that it’s a neighbor. But no. When you answer, it’s “Heather,” a pre-recorded voice wanting to sign you up for a resort vacation, give your business a loan, or help with your credit card debt. Angered by the intrusion, you tap the red hangup button, wishing you had an old-style telephone receiver to slam down.
There’s no way to retaliate against these scum-sucking bottom feeders, and the best option is to hang up immediately. For quite a few versions of iOS, you’ve been able to block a caller manually—just tap the i button next to the call in the Recents screen in the Phone app, scroll to the bottom, and tap Block This Caller. But that’s seldom worth doing since telemarketers often spoof the numbers they call from, so it’s unlikely you’d get a second call from the same number.
Instead, I recommend taking advantage of a feature Apple introduced in iOS 10 that enables apps to block calls for you. Quite a few of these apps have appeared, with some of the best reviewed being Nomoro, Hiya, Mr. Number, RoboKiller, and Truecaller. Hiya and Mr. Number are both free and from the same company—Mr. Number is a stripped-down version of Hiya—whereas RoboKiller and Truecaller require an in-app purchase for a monthly membership. I, personally use Nomorobo, and have for both my home phone, and IOS phone. If your on AT&T you can also get "Call Protect" which is free and actually an AT&T branded version of Hiya.
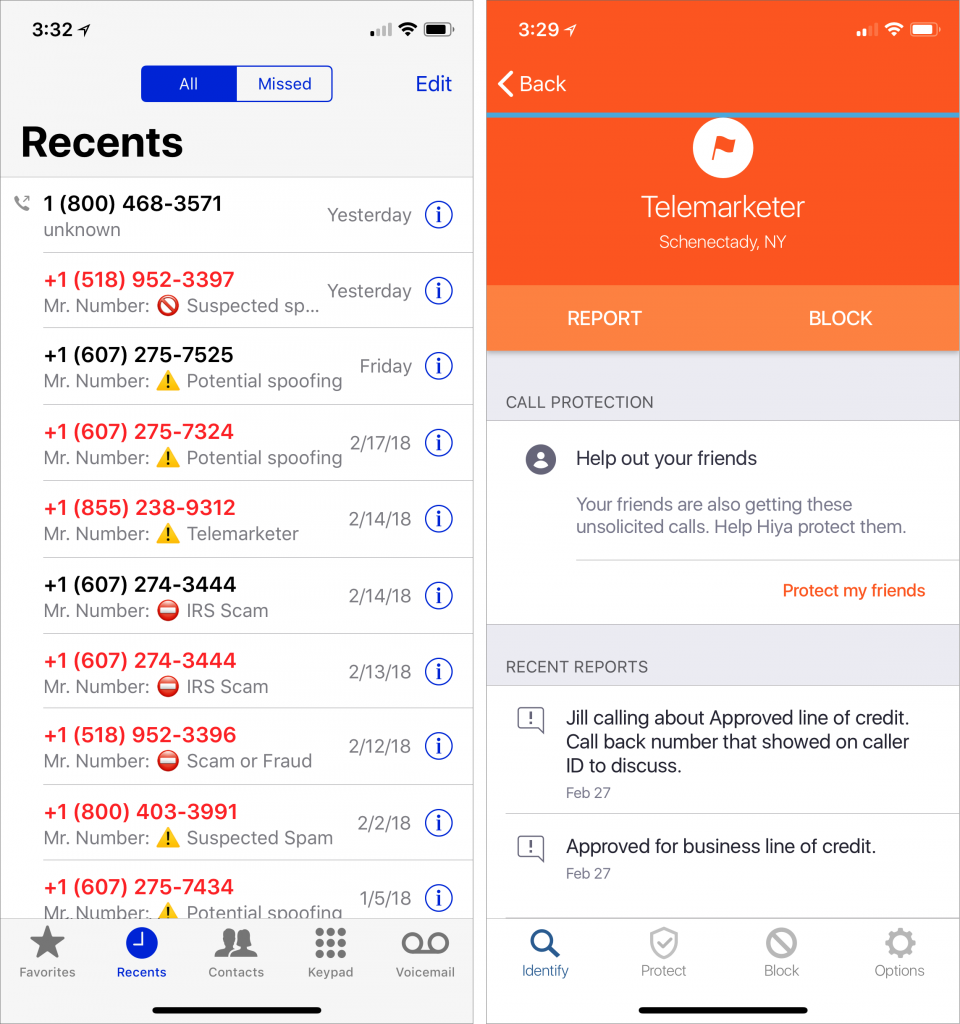
In general, these apps work by receiving caller ID information from iOS and comparing it against both your local contacts (to identify good calls) and a constantly updated database of numbers used by telemarketers (bad calls). Calls from your contacts ring through normally, as do calls from phone numbers not in either of those sets. That’s key, since your doctor might call back from a secondary number, or your kid’s new teacher might call to talk about an upcoming snack day. But if you receive a call from a number known to be used by a telemarketer, the app can either identify it on the incoming call screen or block it automatically, sending it to voicemail.
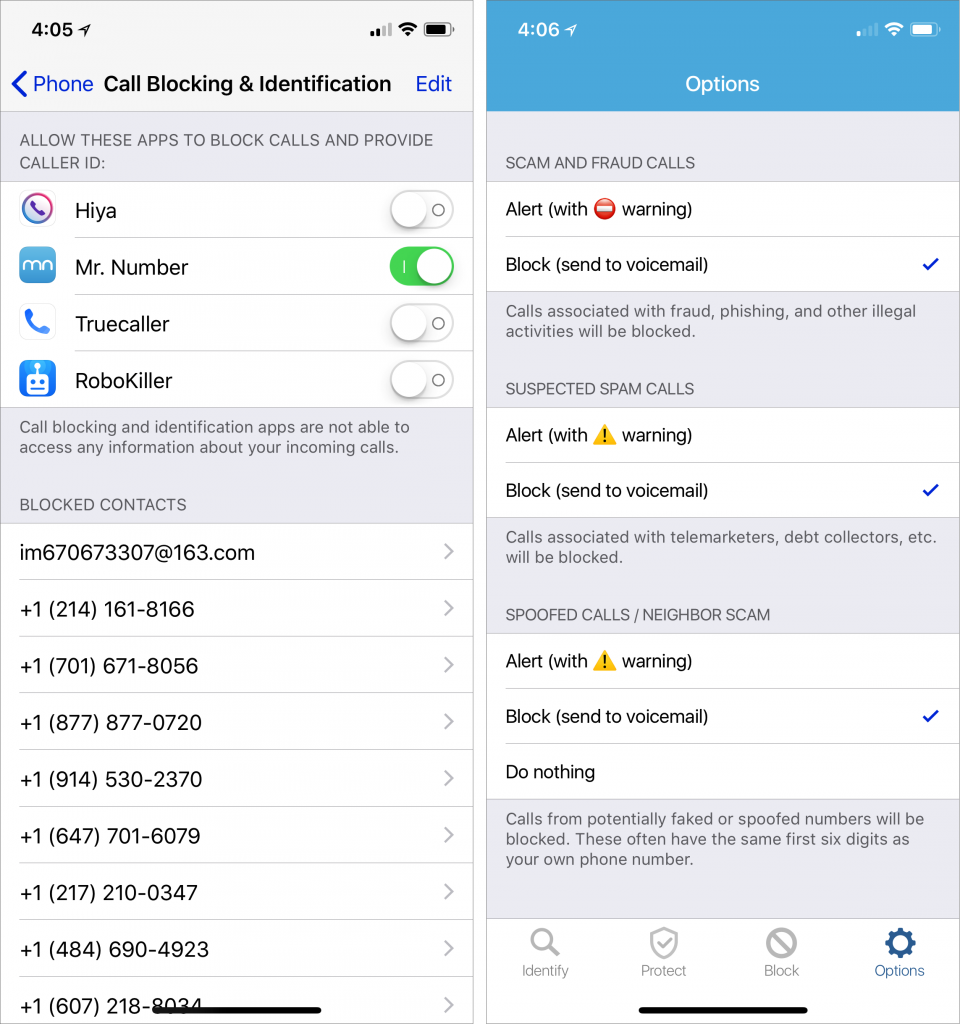
To enable one of these apps, after you download it from the App Store, go to Settings > Phone > Call Blocking & Identification and enable its switch. You’ll probably also have to do some setup in the app itself, providing your phone number, perhaps creating an account, and determining what should happen with different calls (Mr. Number is shown below, right).
With Hiya and Mr. Number, you can copy a number from the Phone app’s Recents screen (tap the i button for a call, and then press the number to access a Copy button) and then look it up to learn more and see comments other users have made. And if you get a telemarketing call from a number that the app doesn’t recognize, you can submit it to protect others.
RoboKiller claims that it wastes the telemarketers’ time by playing pre-recorded “Answer Bots” conversations to keep them on the line, preventing them from calling more people.
Details vary by app, but the only real downside to using one of these apps is that it may ask for information about you or your contacts to improve its services. If that feels intrusive, investigate one of the apps that requires a membership, like RoboKiller, to see if it better answers your concerns.
In the end, it comes down to how many telemarketing calls you receive each day, week, or month. If you’re lucky and get only one or two per month, it’s probably not worth messing with a call blocking app—maybe just send unidentified (and unexpected) calls to voicemail. But if you’re interrupted by multiple junk calls per day or week, give one of these apps a try and let it reduce the onslaught.

Thursday, February 8, 2018

Call 911! Or, with an iPhone or Apple Watch, Invoke Emergency SOS.

Have you ever needed to call emergency services from your or someone else’s iPhone? Almost by definition, such calls take place at stressful times, and it can be hard to remember what to do. Or, if you’ve been in an accident, it might be difficult or impossible to navigate the iPhone’s interface. In iOS 10.2 and watchOS 3 and later, Apple added the Emergency SOS feature to help.
Emergency SOS does three things:
  • First, it calls emergency services, using whatever number is appropriate for your location, which could be particularly helpful when you’re traveling abroad.
  • After your emergency call ends, Emergency SOS sends a text message with your location to emergency contacts that you’ve set up previously in the Health app.
  • Finally, it displays your Medical ID for first responders so they can be aware of things like medication allergies. You create your Medical ID in the Health app as well.
How you invoke Emergency SOS varies slightly depending on which Apple device you have:
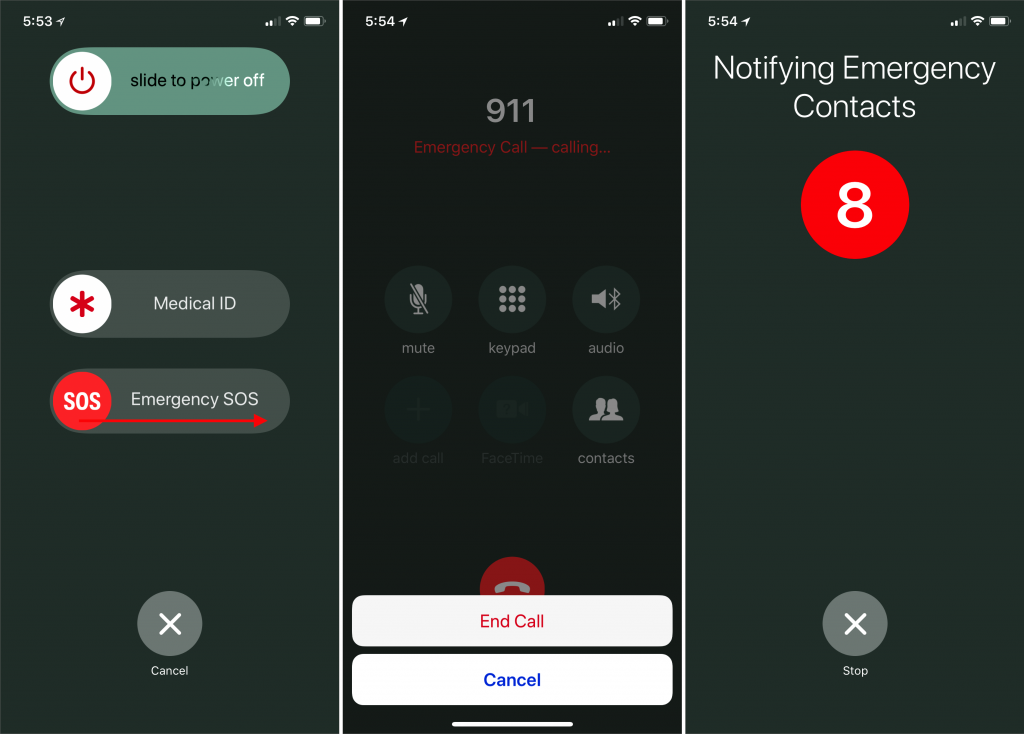
  • On the iPhone 8, iPhone 8 Plus, and iPhone X, press and hold the side button and either of the Volume buttons until the Emergency SOS slider appears. Either drag the Emergency SOS slider to call emergency services right away, or just keep holding the side and Volume buttons. If you continue holding the buttons down, a countdown begins and an alert sounds; at the end of the countdown, the iPhone automatically places the call, a feature that Apple calls Auto Call.
  • On the iPhone 7 and earlier, rapidly press the side button five times to bring up the Emergency SOS slider. Drag the slider to call emergency services. (The quintuple-click can work on the new iPhones too; it’s an option in Settings > Emergency SOS.)
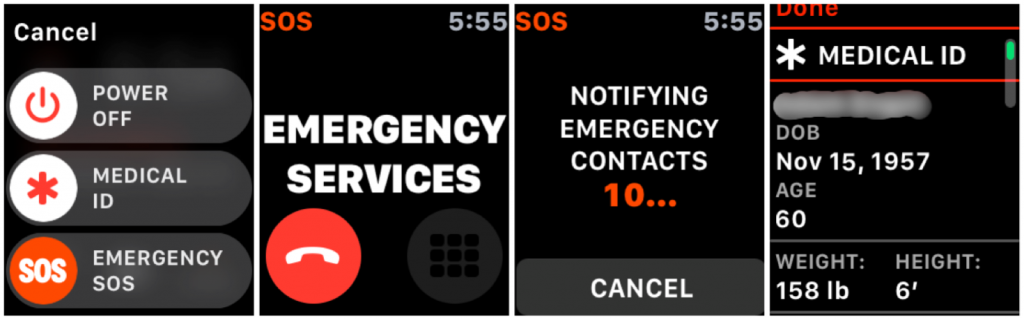
  • The Apple Watch acts like the newer iPhones. Press and hold the side button to bring up the Emergency SOS slider, or keep holding the side button to start a countdown after which the Apple Watch will call emergency services automatically via Auto Call. The Apple Watch must be connected to your iPhone, be on a known Wi-Fi network and have Wi-Fi Calling enabled, or be an Apple Watch Series 3 with a cellular plan.
It’s only human to want to test this in a non-emergency situation, and you can do so without actually placing the call. On both the iPhone and the Apple Watch, there will be a red hangup button you can tap, followed by an End Call or Stop Calling button. Similarly, you can cancel notifications of your emergency contacts.
You’ll also want to stop calls if they’re placed accidentally—we know someone who had his hand in his pocket in such a way as to press the Apple Watch’s side button long enough to start the call, and since he was in a noisy environment, he didn’t hear the alert or notice anything until the 911 service called his iPhone back.
To add emergency contacts—the people who you’d want notified if you were in an accident, for instance—follow these steps on your iPhone:
  1. Open the Health app, and tap the Medical ID button at the lower right.
  2. Tap Edit, and then scroll down to Emergency Contacts.
  3. Tap the green + button to add a contact.
  4. Select the desired person, and when prompted, pick their relationship to you.
  5. Tap Done to save your changes.
Two notes. First, if you’re concerned about activating the Auto Call feature inadvertently, you can turn it off in Settings > Emergency SOS on the iPhone, and for the Apple Watch in the Watch app, in My Watch > General > Emergency SOS.
Second, bringing up the screen with the Emergency SOS slider also automatically disables Touch ID and Face ID, such that you must enter your passcode to re-enable them.
I sincerely hope that you never have to use Emergency SOS, but that if you do, it proves to be a faster and more effective way of contacting emergency services.


Saturday, July 29, 2017

Quick Tip - Try This Easier Method of Flipping between iPhone Camera Modes


The Camera app on the iPad, iPhone, and iPod touch can take three kinds of video and three types of photos, and the interface suggests that you switch between them by tapping or swiping on the labels below the viewfinder. 

Unfortunately, those labels are small and can be difficult to swipe accurately. If you’ve found moving between modes frustrating, try swiping left or right on the entire viewfinder, which has the same effect as swiping on the labels but with a much larger swipe area. And, if your Camera app occasionally takes an unexpected type of photo, an errant swipe could explain it.


Swipe-on-viewfinder

Monday, July 17, 2017

Quick Tip - PSA: Hot Cars Can Kill iPhones


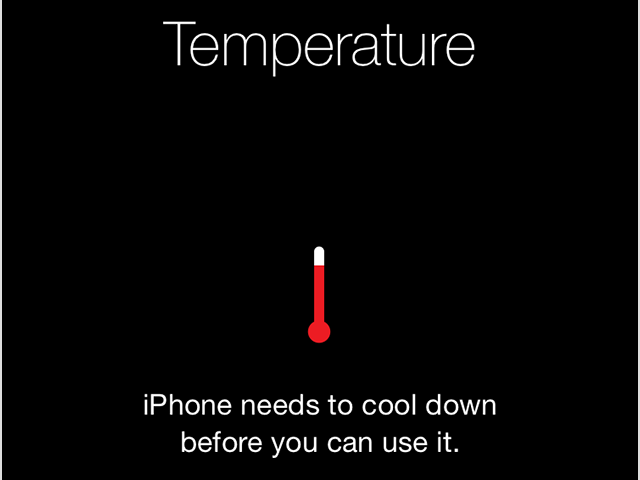
Just as you wouldn’t leave your pooch in a car parked in the sun, you should be careful with your iPhone. It’s rated for use at up to 95℉ (35℃) and can be stored at up to 113℉ (45℃), but temperatures inside a parked car on a sunny day can exceed 130℉ (55℃) within 30–60 minutes. That can both temporarily disable your iPhone and damage the battery more permanently. 

If your iPhone gets too hot, it warns you, “iPhone needs to cool down before you can use it.” It also stops charging, dims or turns off the display, puts its radios in a low-power state and disables the camera flash, although audible turn-by-turn directions will continue. Turn it off and let it cool down for a while.

temperature_cool_down

Monday, May 15, 2017

Prepare for the Worst with an iPhone Medical ID

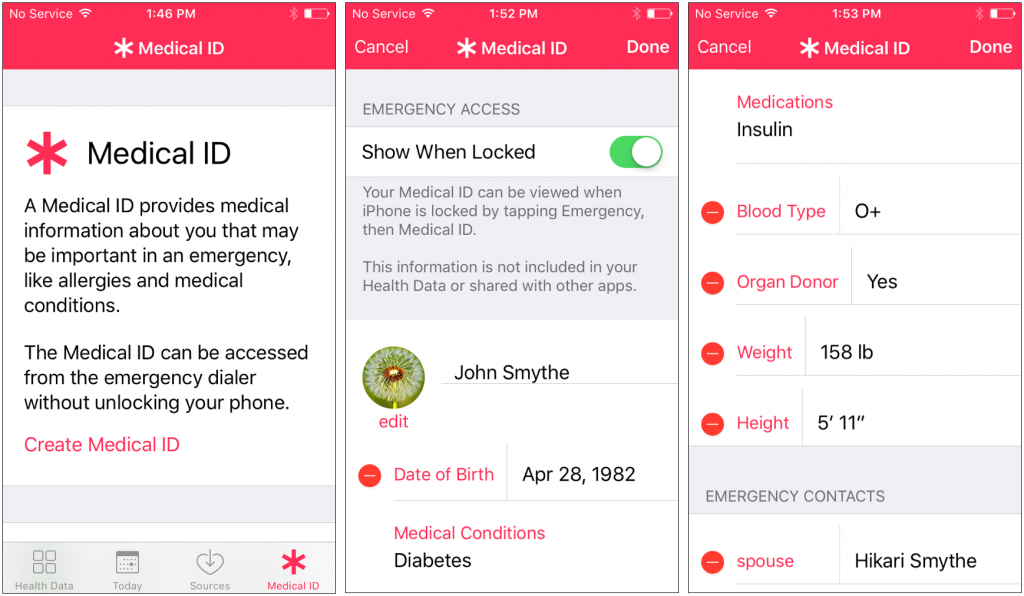
No one expects to be in an accident, but if you are, and if you end up in a state where you can’t speak with the emergency responders, wouldn’t you like your iPhone to help? Once you enter your medical data and emergency contact info into Apple’s Health app, anyone can use your iPhone to learn about your medication allergies and other conditions, plus contact your family. Even if you are too shaken up to share your details clearly, you may be able to point at your phone sufficiently to show your Medical ID. This data could also help a Good Samaritan return a lost iPhone (unfortunately, the Health app isn’t available on the iPad).
To enter this essential information in your iPhone, follow these steps.
  1. Open the Health app, and tap Medical ID in the button bar at the bottom.
  2. Tap Create Medical ID on the first screen that appears.
  3. In the Medical ID screen, make sure the Show When Locked switch is on.
  4. Enter all the relevant details about your medical conditions, medications, allergies, and so on.
  5. Specify one or more emergency contacts. These must be people in the Contacts app with phone numbers; if the right people aren’t there, add them first. You can’t select your own card in Contacts, so consider making one for a fake person called “If Lost, Please Call” and listing a different phone number at which you can be reached.
  6. Tap Done once you’ve finished entering your information.
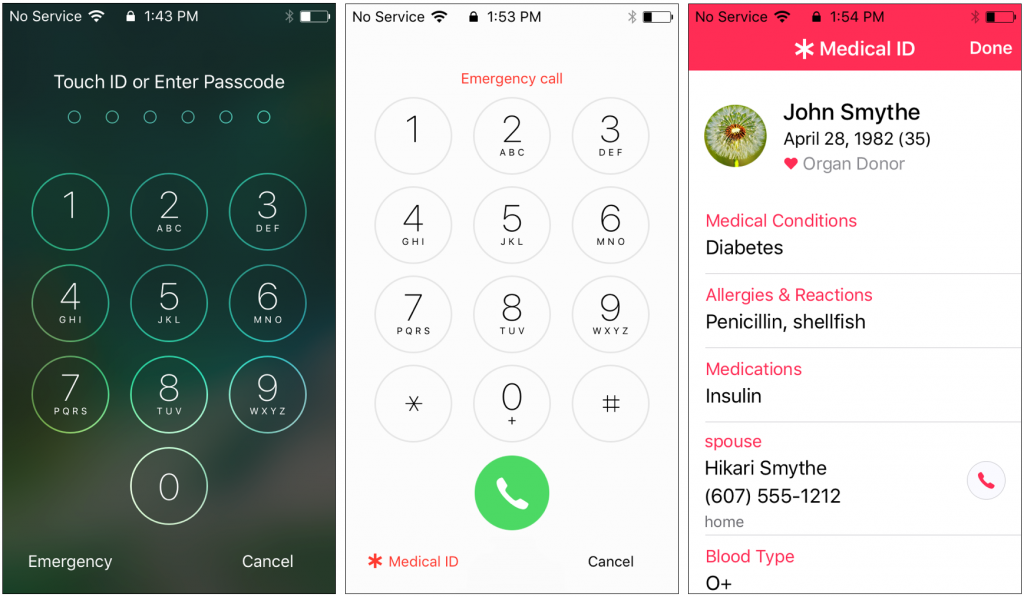
Hopefully, you’ll never have to use someone else’s Medical ID information, but you should know how to do so. You should also teach family, friends, and colleagues how to find and use this information. Should you come across a bicyclist who has had a bad crash or a similar situation, follow these steps:
  1. With a locked iPhone, press the Home button to display the Passcode screen.
  2. On the Passcode screen, tap Emergency in the bottom-left to move to the Emergency screen. If needed, call 911 from this screen.
  3. Again at the bottom left, tap Medical ID to display the Medical ID screen, complete with all the details that person entered into the Health app.
  4. From that screen, you can share the information with EMTs or other first responders so they’re aware of any serious conditions or allergies that would affect treatment. You can also call any emergency contacts listed.
Please, enter your medical and emergency contact details into the Health app right now, and spread the word to everyone you know. It could save your life, or help you save someone else’s!

Monday, May 8, 2017

11 Ways to Ensure Your iPhone Battery Life Goes to 11

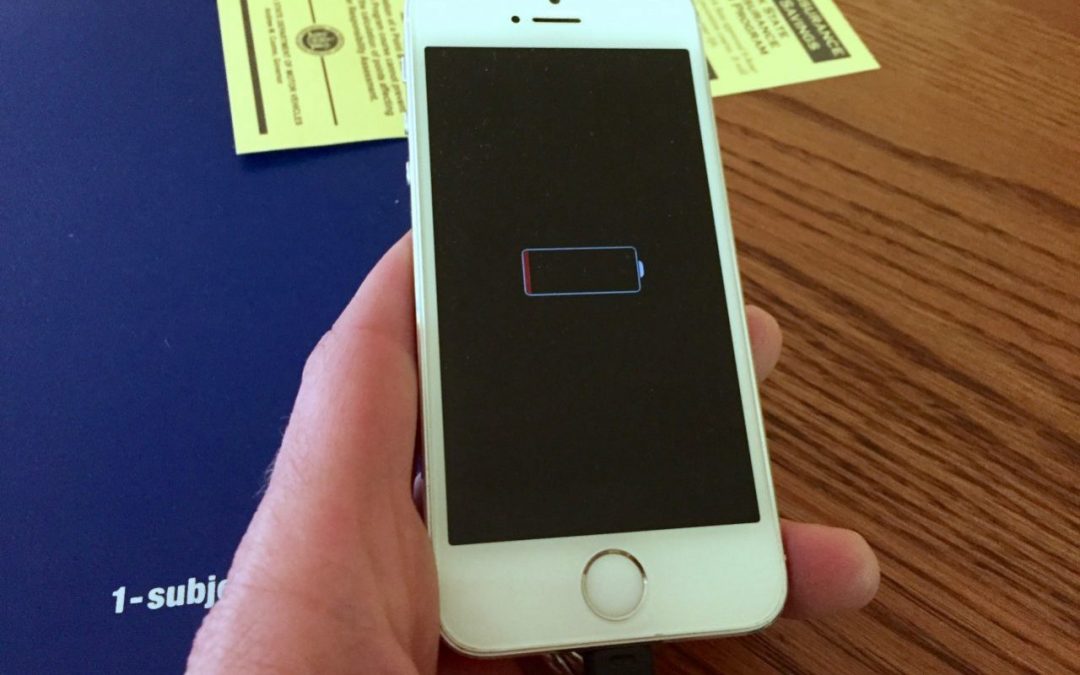
It’s inevitable. At some point, you’ll need your iPhone, but its battery will be dead. And as an iPhone ages, its battery becomes weaker, to the point where it may have trouble making it through a typical day of use. Charging the iPhone during the day may stave this off, and you could lug around an external battery (or have the battery replaced!), but a few simple tweaks will cut power usage and extend your battery life:
  • Don’t stream media or use GPS navigation when battery life is paramount, since these are the most power-hungry activities you can engage in on your iPhone. If you do use GPS navigation, make sure it stops (or stop it manually) when you reach your destination. Similarly, store music locally rather than streaming it via Apple Music or Spotify.
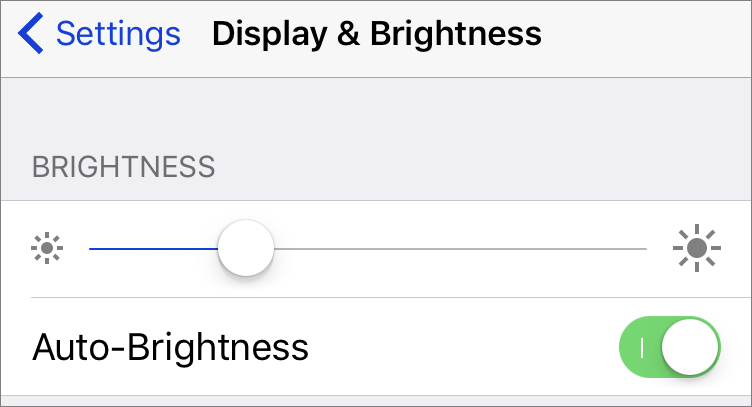
  • Reduce screen brightness. The screen takes a lot of power, so you’ll save juice if you drag the brightness slider to the left in Settings > Display & Brightness (you can also adjust brightness in Control Center; swipe up from the bottom of the Lock screen or Home screen). Also turn on the Auto-Brightness switch so iOS can reduce brightness automatically in dark conditions.

  • Turn off unnecessary notifications in Settings > Notifications to prevent apps from waking your iPhone’s screen repeatedly—turning it on to display a notification takes power.
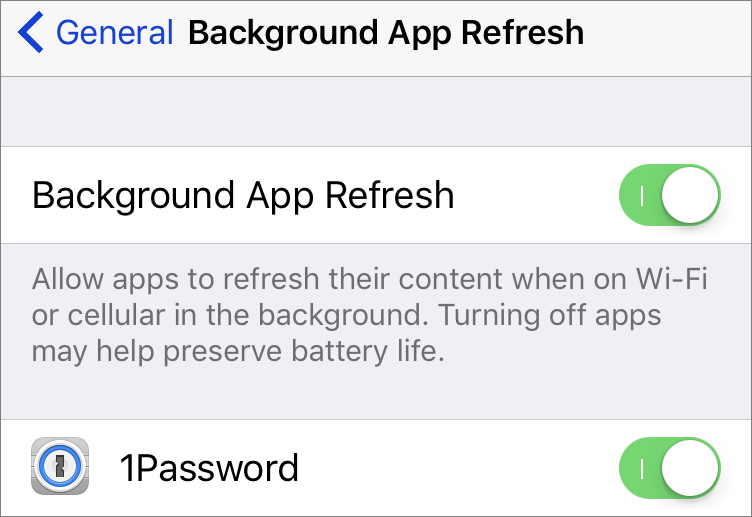
  • Turn off Background App Refresh. This setting, located in Settings > General > Background App Refresh, lets you prevent apps from updating themselves in the background, which can chew power. Disable any unnecessary apps here, or turn off the feature entirely.
  • Adjust Location Services usage in Settings > Privacy > Location Services. It’s best to leave Location Services turned on in general, but if you have little-used apps set to Always, consider changing their setting to While Using the App or Never. Apps that have recently used location services display a purple indicator (scroll to the bottom of the list for a key to the indicators).
  • Turn down the volume and use earbuds when possible. Using the iPhone’s speakers draws power, so the lower the volume, the less power used. Plugging in earbuds reduces audio-related power usage even more. Along the same lines, when sending audio to a remote speaker, Bluetooth uses less power than AirPlay.
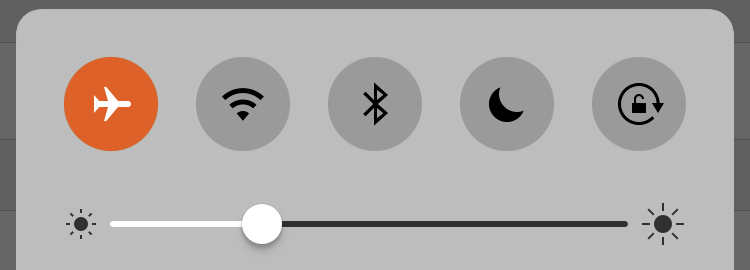
  • Use Airplane Mode in weak cell coverage areas. When the iPhone is searching for a better signal, it increases power to its radios, which hurts battery life. Going into Airplane Mode (tap Settings > Airplane Mode or tap the Airplane Mode button in Control Center) prevents you from making or receiving calls or SMS text messages but saves a lot of power. Just remember to disable Airplane Mode later!
  • Use Wi-Fi in favor of cellular. Since Wi-Fi can use less power than cellular data (particularly when the cell connection isn’t strong), connect to a Wi-Fi network when possible; go to Settings > Wi-Fi to find an available network if you’re not prompted automatically (which you can turn on with Ask to Join Networks in that screen). Also, in Settings > Cellular, scroll down to see an app list and disable cellular data for apps that you don’t need while out and about, but that are transferring non-trivial amounts of data.
  • Disable automatic downloads, or restrict them to Wi-Fi. In Settings > iTunes & App Stores, you can disable automatic downloads for purchased music, apps, and books made on other devices, which could save a little power. Or just disable Use Cellular Data in that screen, which increases the likelihood that the downloads will happen on Wi-Fi when you’re near a charger.
  • Avoid extreme cold or heat. Cold temperatures will drastically reduce your iPhone’s battery life, albeit temporarily, whereas hot temperatures can permanently hurt the battery’s ability to hold a charge.
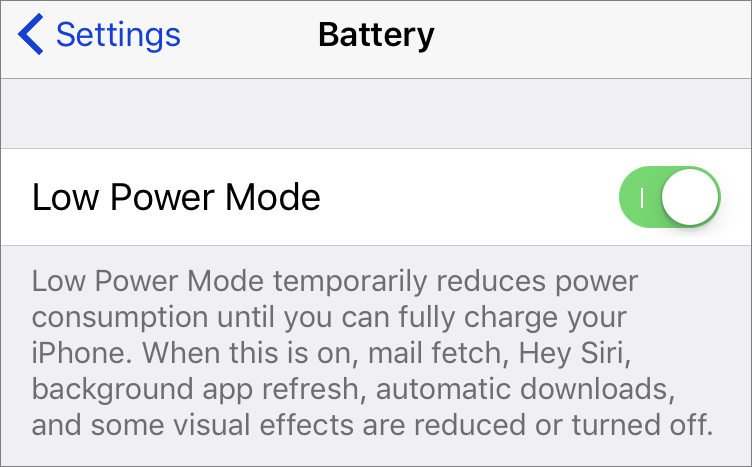
  • Enable Low Power Mode. In Settings > Battery, flip the switch for Low Power Mode to tell your iPhone to use less power for a variety of background activities and visual effects. iOS automatically prompts you to turn Low Power Mode on when the battery drops to 20%; it’s best to accept that suggestion. Low Power Mode is automatically disabled when the iPhone charges sufficiently.

Monday, May 1, 2017

Erase iOS Devices Before Passing Them On


If you have an old iPad, iPhone, or iPod touch that you want to sell or give away, you don’t want to leave any of your apps, data, or personal information on the device. Luckily, Apple makes it easy to reset your idevice to factory defaults. 

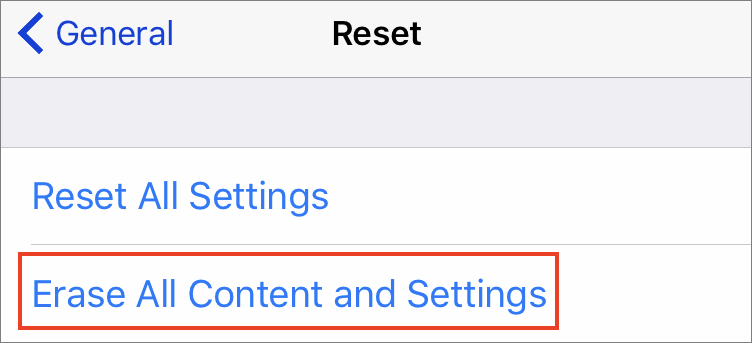
Go to Settings > General > Reset (all the way at the bottom) and then tap Erase All Content and Settings. Enter your passcode, confirm the erasure (twice!), and then type your Apple ID password (if you have Find My Phone turned on, like you should!). After all that, the device restarts just as though you’re taking it out of the box for the first time. Now your ready to sell or give the device away, without any of your information on it.

Sunday, April 30, 2017

Build Relationships in iOS with Siri - Call your Mother


When giving commands to Siri, you can refer to people by relationship, rather than name. So, if you want to call your mother on your iPhone, you can say “call my mother” instead of something like “call Natasha Jauch-Hoechstetter.” But to do this, you need to introduce Siri to your family. 

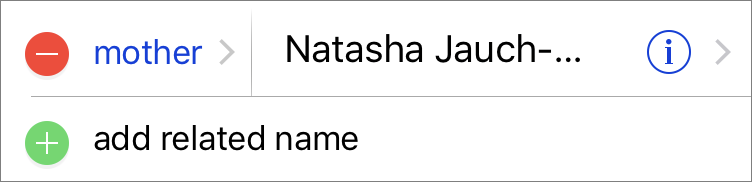
First, make sure you have a “card” in the Contacts app for yourself, and then go into Settings > Contacts, scroll down to find and tap My Info, and select your card so Siri knows who you are. Next, make sure you have a contact card for your mother, and then tell Siri, “Natasha Jauch-Hoechstetter is my mother.” Or, if Siri doesn’t hear you correctly, open Contacts, open your card (not your mother’s!), tap Edit, scroll down, tap “add related name,” tap the default relationship to pick “mother,” tap the info “i” icon, select your mother’s card, and tap Done.

Wednesday, April 26, 2017

Why You Shouldn’t (Usually) Quit Apps on Your iPhone

On the Mac, when you’re done with an app you quit it. Many people think the same is true on the iPhone, where you can double-press the Home button to access the App Switcher and then swipe up on an app to quit it. But just because you can do it doesn’t mean you should. Worse, contrary to what some people believe, quitting iPhone apps will likely hurt battery life.

iOS thinks differently about how apps run. When you’re using an app—say, Safari—it’s accessing the iPhone’s CPU and radios and thus using battery power. However, a few seconds after you press the Home button to return to the Home screen or lock the screen by pressing the Sleep/Wake button, iOS puts the app into a state of suspended animation. In that state, it’s not using CPU or battery power, but it does remain resident in memory, which turns out to be important.

Imagine that you next open Notes, which becomes the active app and starts consuming CPU, memory, and battery resources. Tap a Web link in a note, and iOS activates Safari and suspends Notes. Because Safari was suspended and thus is still in memory, it’s faster and easier for iOS to activate it than to launch it from scratch. 

As you continue switching among apps, there won’t be enough memory for each app to remain suspended, so iOS quits apps to free up enough memory. There’s no way to know when iOS has done this; it’s invisible to the user. If you try to help iOS by quitting apps manually, you’ll force it to waste more resources later when those apps have to be launched afresh. You can get a sense of this by swiping far to the right in the App Switcher; it probably lists many more apps than you’d expect. That’s not a list of running apps; it’s a list of previously used apps.

So, 98% of the time, there’s nothing to gain and some speed and battery life to lose by quitting apps. But there are two legitimate reasons to quit apps: to restart a frozen or confused app, or to prevent certain background apps from using power unnecessarily.

Although it’s unusual for iOS apps to freeze or misbehave, it can happen, so if an app isn’t responding, or if it’s acting weirdly, quit it. That usually solves the problem; if it doesn’t, restart, or you might need to download an update or delete the app and reinstall it from the App Store.

iOS allows some apps to run in the background instead of being suspended. For instance, if you use Maps, you want it to keep tracking your location and providing turn-by-turn navigation even if you’re using Podcasts. Similarly, iOS allows some apps, like Skype, to listen for incoming calls in the background. There are a few other categories of allowed background apps—audio apps like Podcasts, for instance—but in all cases, if you’re trying to preserve as much battery life as possible, consider quitting background apps whose services you don’t need. For example, if you park before arriving at your destination, you might quit Maps to ensure that it doesn’t continue to track your location. And if missing an incoming call is less important than saving some battery power, quit Skype.

But these are infrequent exceptions to the rule. Most of the time, quitting apps is a waste of both your time and your iPhone’s battery.

Thursday, April 20, 2017

Use Your iPhone as a Personal Wi-Fi Hotspot for Your Mac or iPad


You’re on a trip, accompanied by your trusty iPhone and MacBook Air. Suddenly there’s an emergency at work, and you need to get online with your Mac. You can pick up a cell signal with the iPhone, but there’s no Wi-Fi to be found—what do you do?

Never fear, since you can use your iPhone’s cellular data plan to create a personal Wi-Fi hotspot that lets your Mac access the Internet through your iPhone. Also called “tethering,” it’s fast, easy, and can be a life-saver when you just have to get online with a Mac (or a Wi-Fi–only iPad).

First, note that most, but not all, cellular carriers allow tethering on existing plans. For some, you might have to pay more for tethering. Regardless, any data consumed by your Mac while tethered will count against your data allowance and may generate overage fees. Carriers with “unlimited” data often limit the amount of data you can use via tethering or throttle your bandwidth to slower speeds if you use too much data.

Along those lines, if you use a file-sharing service like  Dropbox or Google Drive, or an Internet backup service like CrashPlan or Backblaze, turn them off before connecting. Particularly if they haven’t checked in for some time, those services can transfer a lot of data quickly, which could result in a hefty overage charge or awkward data throttling for the rest of the month.

With those warnings out of the way, follow these steps to turn on Personal Hotspot:
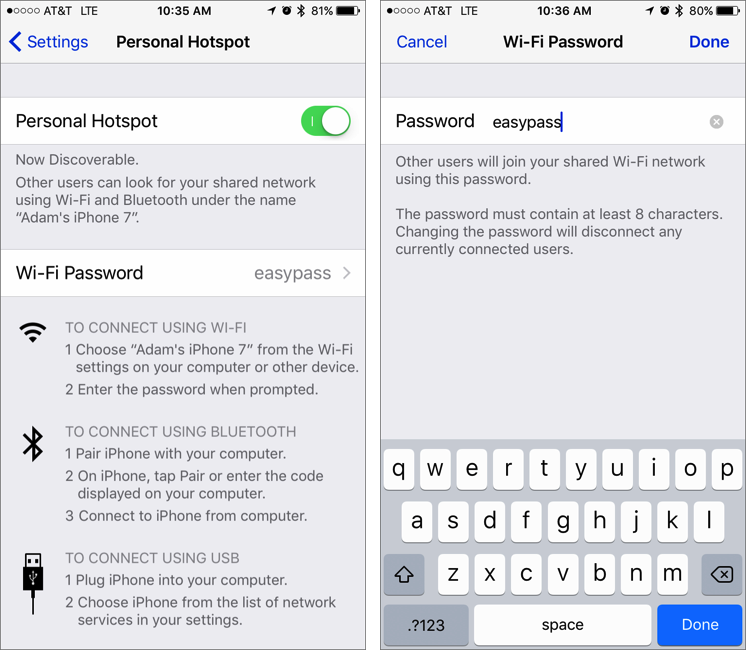
  1. On your iPhone, if you’ve never enabled the feature before, go to Settings > Cellular > Personal Hotspot. Once you’ve turned Personal Hotspot on once, it moves up a level so you can access it from Settings > Personal Hotspot.
  2. Tap Wi-Fi Password and enter a password that’s at least 8 characters long and easy to type. It doesn’t need to be super secure because you can keep Personal Hotspot turned off unless you’re using it. But you do want a password so random people nearby can’t connect and use your data.
  3. Once you’ve entered a password, enable the Personal Hotspot switch.
That’s it! The Personal Hotspot screen provides basic instructions for connecting to the iPhone via Wi-Fi, Bluetooth, and USB. Stick with Wi-Fi, since it’s the easiest and most reliable in most cases.
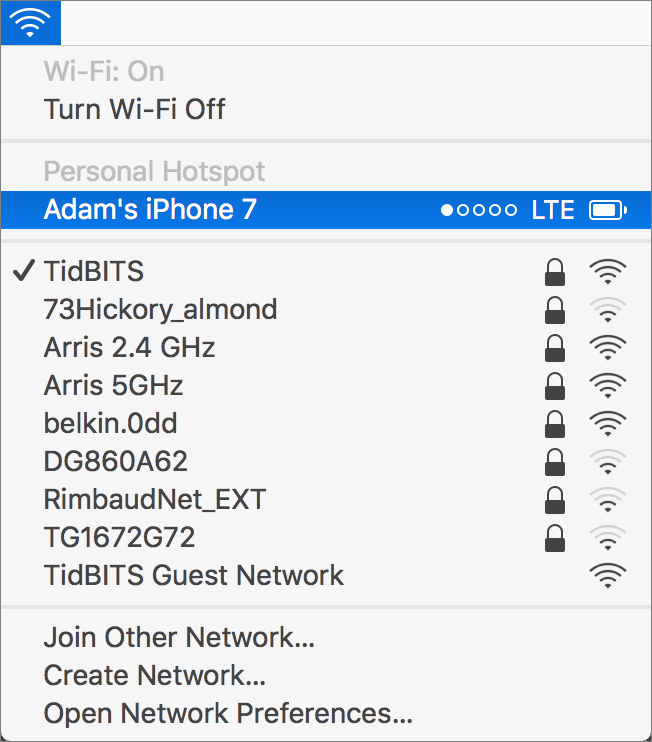
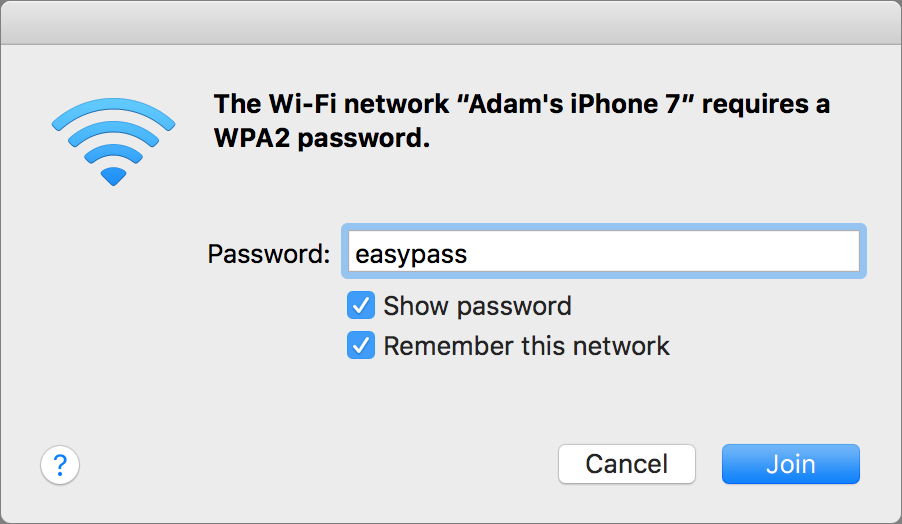
  1. On your Mac, click the Wi-Fi icon in the menu bar and choose your iPhone’s name.
  2. Enter your password when prompted, making sure to select “Remember this network.” That way, you won’t have to enter your password the next time.

  3. The Mac then connects to your iPhone, showing a hotspot icon instead of the usual wave icon for the Wi-Fi menu.


Could it get any simpler? When you’re done, the safest thing to do, to ensure you don’t accidentally end up using too much of your data allowance, is to turn off the Personal Hotspot switch on your iPhone in Settings > Personal Hotspot. Your Mac will automatically disconnect.

Monday, April 17, 2017

Find My Phone nabs Coachella thief holding over 100 stolen phones!


I can not stress enough, the value of locking your iPhone and turning on Find My Phone with iCloud. Not only can it stop a thief from getting into your phone, but from wiping it and reselling it too. Its also helped people get reunited with lost or stolen phones. Well this weekend, Find My Phone also helped nab a pickpocket thief with over 100 stolen phones in his backpack.

After noticing their phones missing, a number of concert goers activated "Find My Phone" to track their missing devices. The victims then worked with security to detain the individual that apparently was in possession of their phones. Once Indio Police apprehended Reinaldo De Jesus Henao, 36, of New York, he was found to have more than 100 stolen phones in his backpack. He was then booked suspicion of grand theft and possession of stolen property.

Many concert goers were reunited with their phones, but some were still unclaimed. If you know of anyone missing their phone from Coachella this last weekend, direct them to the Coachella online lost and found.

https://www.coachella.com/guidebook/lostandfound/

Wednesday, March 29, 2017

4 New Apple OS Features You Can Use Today

Apple just released new versions of all its operating systems—iOS, macOS, watchOS, and tvOS—fixing bugs, plugging security holes, and, best of all, adding a few new features. Here are four things you can do once you’ve updated. (If you’re concerned that installing the updates may cause other problems, check with me first.)

1: Sleep better after using your Mac late at night.
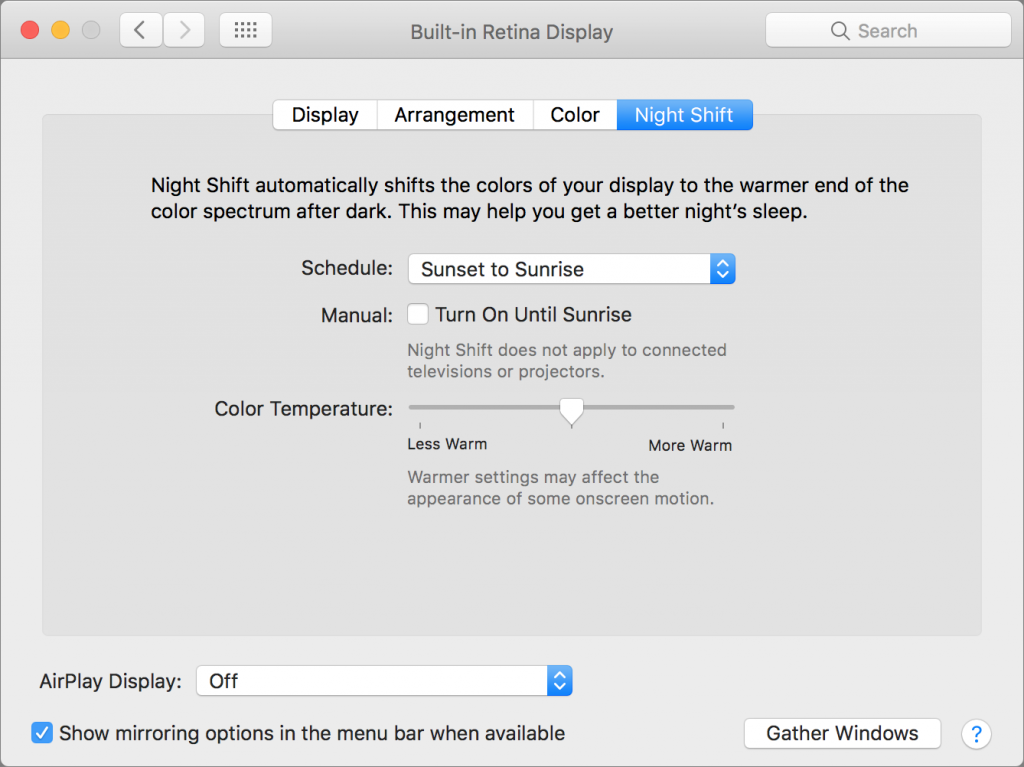
macOS 10.12.4 Sierra has gained Night Shift, a feature from iOS that automatically shifts the colors of the screen to the warmer end of the spectrum after dark. Night Shift may help you sleep better by reducing the amount of blue light that tricks your body into thinking it’s earlier than it is.
To set up Night Shift, open System Preferences > Displays > Night Shift and choose Sunset to Sunrise from the Schedule pop-up menu. Night Shift knows when the sun rises and sets wherever you are, but if you prefer, you can also set custom on and off times. (If you don’t see the Night Shift button in the Displays preference pane after upgrading to 10.12.4, your Mac is unfortunately too old to support Night Shift.)


If you’re working with graphics at night, or if video looks odd, you can turn off Night Shift manually. Do that either in the Displays preference pane or by scrolling down in Notification Center (click it in the upper-right corner of the screen) to see the Night Shift switch.

2: Find the AirPod that fell between the couch cushions.

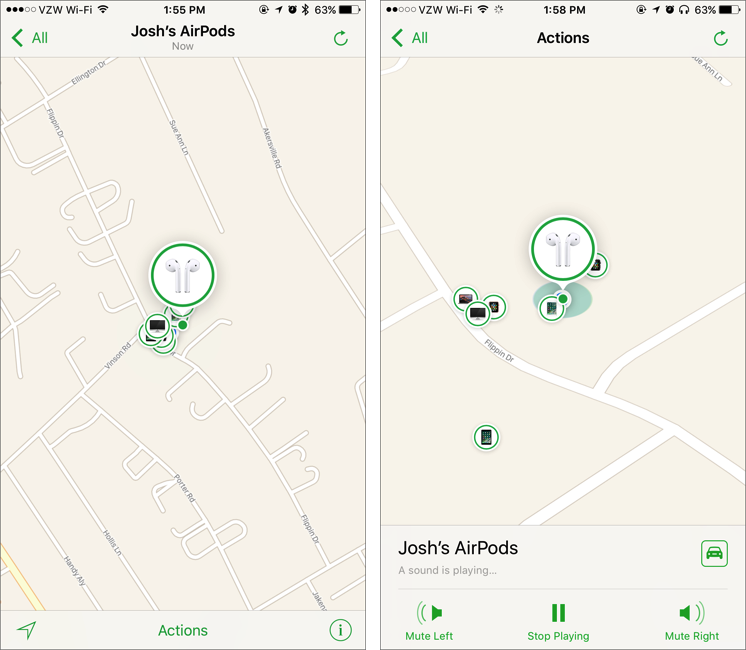
Apple’s wireless AirPods earbuds are cute, but they’re also easy to misplace. If you can’t find yours, iOS 10.3’s Find My iPhone app can help. Bring it up, tap the AirPods icon in the display, and then tap the Play Sound button to make them play a locator sound. If you’ve lost only one AirPod, you can mute the other so it’s easier to hear where the sound is coming from.


Note that Find My AirPods works only when in range of a paired iOS device, so it may not help if you lose an AirPod while running.

3: Don’t be “that person with the Apple Watch” at the theater.

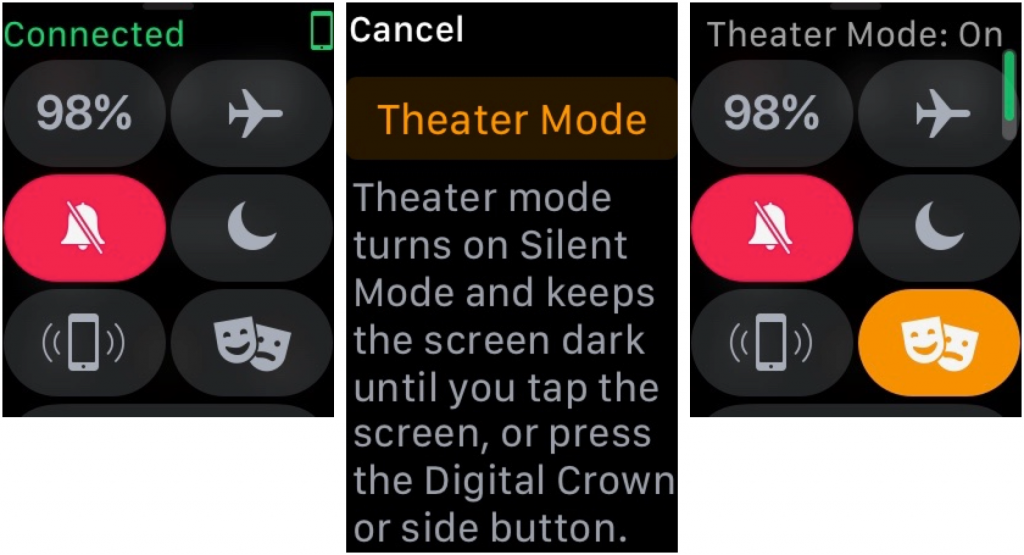
You’re in a darkened theater, at a movie or a play, and when you move in your seat or cover your mouth to cough, your Apple Watch’s screen turns on, annoying the people around you. Even worse is when a notification rolls in, causing the watch to make a sound. Embarrassing, we know. Happily, watchOS 3.2 adds Theater Mode, which turns on Silent mode and keeps the screen dark by disabling its standard “raise to wake” behavior.
To enable Theater mode, open Control Center by swiping up from the bottom of the screen. Then tap the Theater Mode button, which is emblazoned with theater masks. After the performance, you’ll need to disable Theater mode manually by tapping its button again.


If you do need to check the time surreptitiously (who knew this performance would go so long!), tap your Apple Watch’s screen, or press the Digital Crown or side button.

4: Ask Siri to find your car in a humongous parking lot

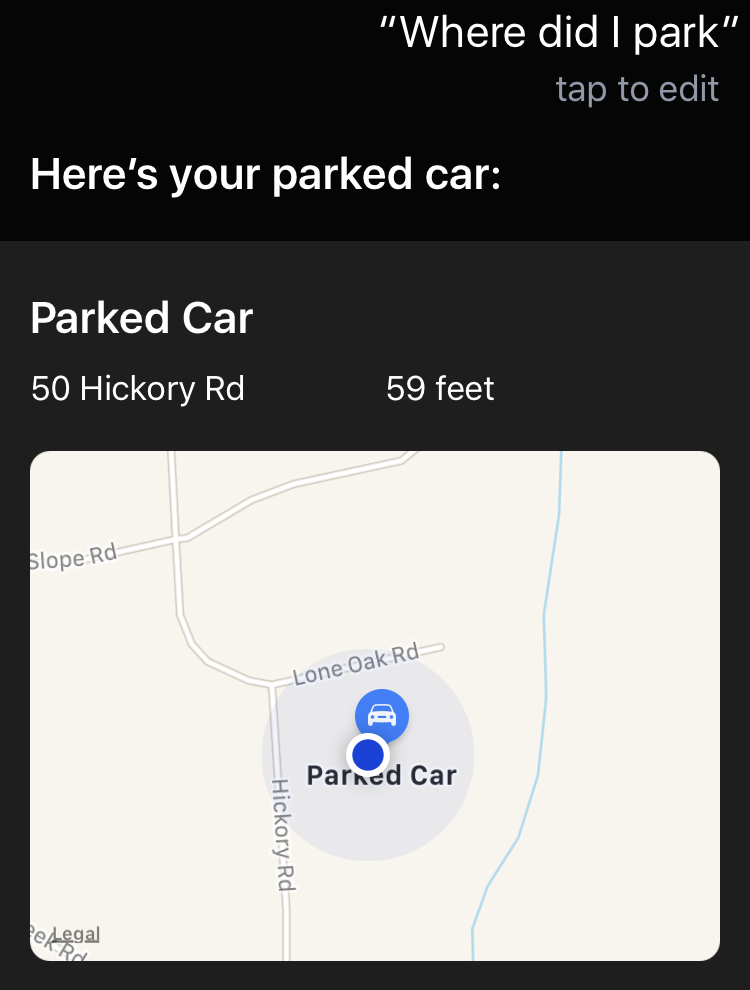
We’ve all been there. You parked at the mall, but got turned around while you were inside, and now you can’t find your car in the sea of automobiles. In iOS 10.3, you can now search for “parked car” in Maps, or just ask Siri, “Where did I park?”


And if you ever lose your car at a place like Disney World, this feature alone will be worth the price of the iPhone!

Note of caution - I typically tell my clients to wait a minimum of two weeks before installing any new updates such as these. Keep in mind the new releases are DAYS old (as of this post). May want to hold off on installing and see if there are any bugs that need worked out. But at least you know about some new features you can look forward to. Feel free to drop me a line if you are interested if its safe yet. ;-)
Thursday, March 23, 2017

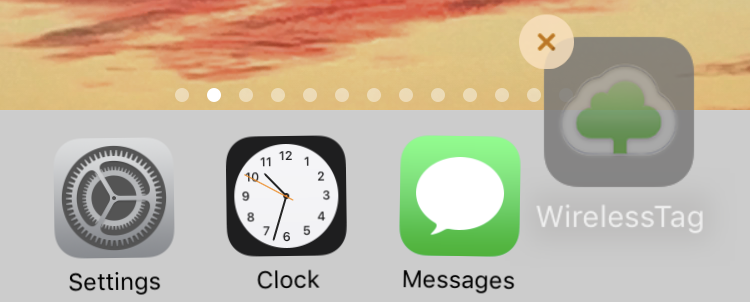
Rearrange iPhone - iPad Home Screen Icons More Easily

Wednesday, March 22, 2017

Apple releases new iPhone and iPad models

Apple Tweaks iPad and iPhone Product Lines 

Apple often adjusts its iPad and iPhone lineup in March, and this year’s changes make the selection more attractive and affordable while adding a new way to support the (RED) international charity. Let’s take a closer look at what Apple has done and what it means for you.

New iPad replaces iPad Air 2

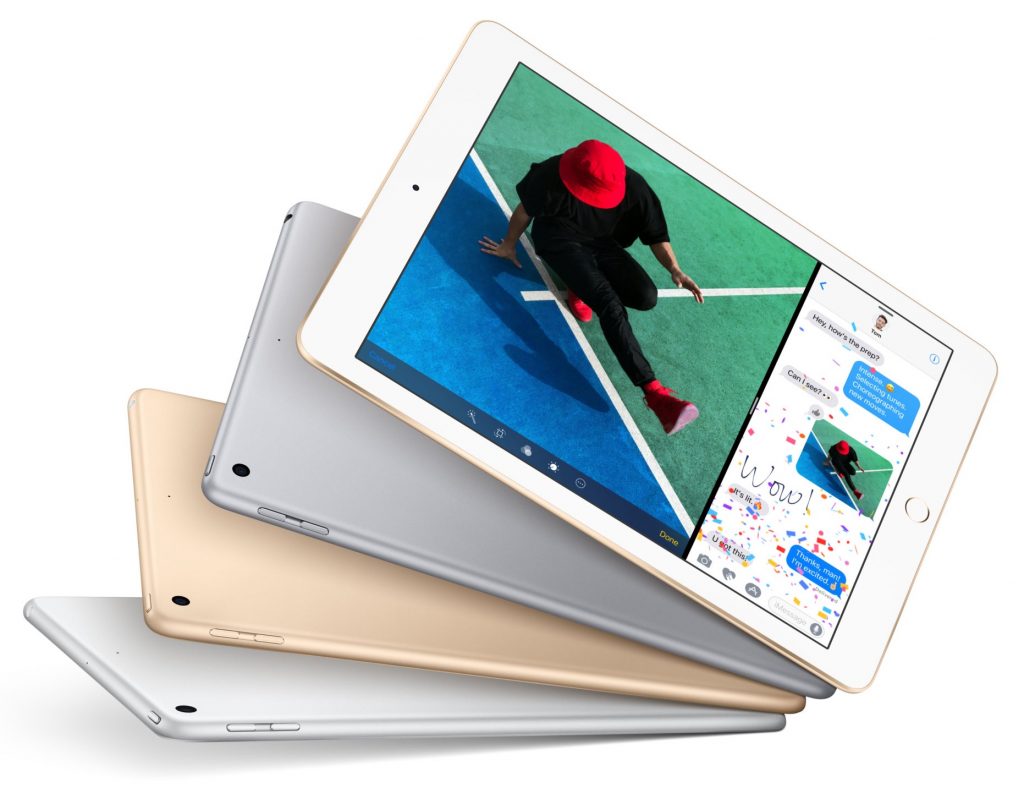
The most significant of Apple’s changes is the replacement of the iPad Air 2 with a new 9.7-inch iPad model called simply “iPad.” This latest iPad is extremely similar to the iPad Air 2, and although most of the changes are for the better, Apple cut a few features so as to reduce the price to the lowest ever for a 9.7-inch iPad.
Physically, the new iPad is almost identical to the iPad Air 2, apart from being 1.4 mm thicker, which might cause problems for some current cases. More interesting is that Apple swapped the iPad Air 2’s A8X processor for the faster A9 chip, which should improve performance. The cameras remain mostly the same too, though photos taken with the rear-facing camera should be somewhat better, thanks to two improvements over the iPad Air 2’s camera: auto image stabilization to help avoid blurry images and a hybrid infrared filter to improve color accuracy and sharpness.
On the downside, the new iPad lacks the iPad Air 2’s laminated display and anti-reflective coating, which combined to increase screen clarity, particularly in bright light. You’d have to compare the new iPad against the more expensive iPad mini 4 or the much more expensive 9.7-inch iPad Pro to see if the screen change is a major problem for you.
The big win with the new iPad is price, which has dropped $70: it’s now only $329 for the Wi-Fi–only 32 GB model or $429 for 128 GB. The cellular models cost $459 for 32 GB and $559 for 128 GB. It’s now the least expensive iPad and what Apple expects most new buyers to purchase. It’s available starting March 24th.

Apple reduces iPad mini 4 price, drops iPad mini 2

The new iPad takes over the entry-level iPad spot from the iPad mini because Apple simultaneously dropped both the iPad mini 2, which had been priced at $269, and the 32 GB model of the iPad mini 4, which previously sold for $399. That leaves just the 128 GB iPad mini 4, and Apple slashed $100 off its price to bring it down to $399. Despite the price drop, unless you especially want the iPad mini’s smaller size or better screen, it’s probably worth $30 to move up to the new 128 GB iPad.

Paint the town (RED) with new iPhone 7 models

For more than 10 years, Apple has partnered with the (RED) international charity to raise money for the Global Fund to combat AIDS, tuberculosis, and malaria. By offering products in the licensed PRODUCT(RED) color and donating a portion of the proceeds, Apple has raised over $130 million for (RED), making it the charity’s largest corporate donor.
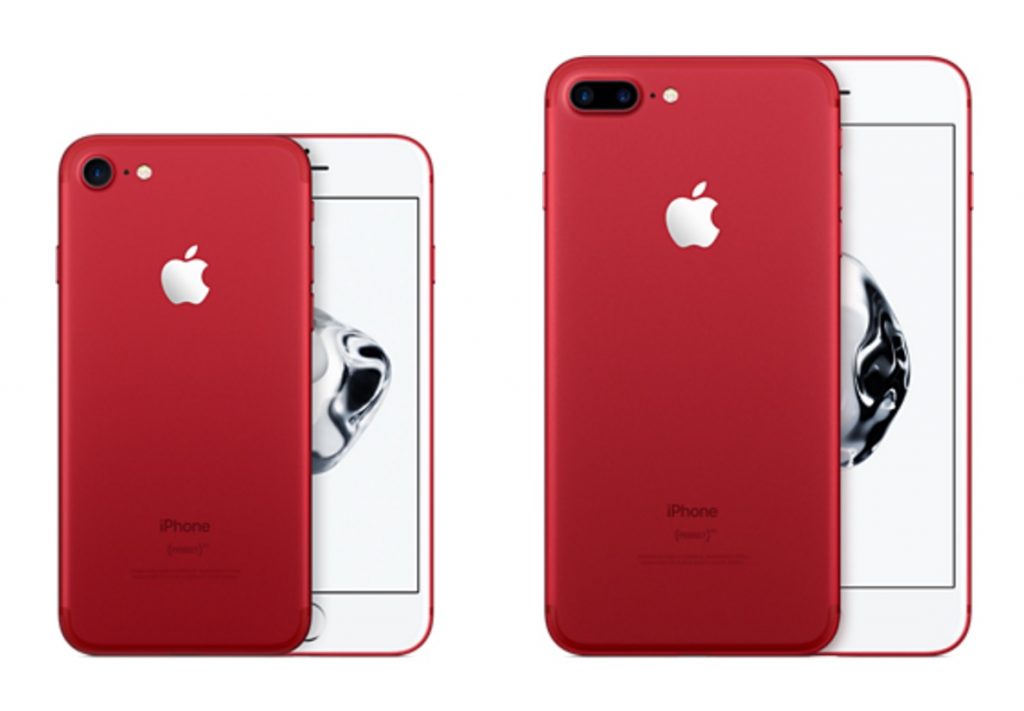
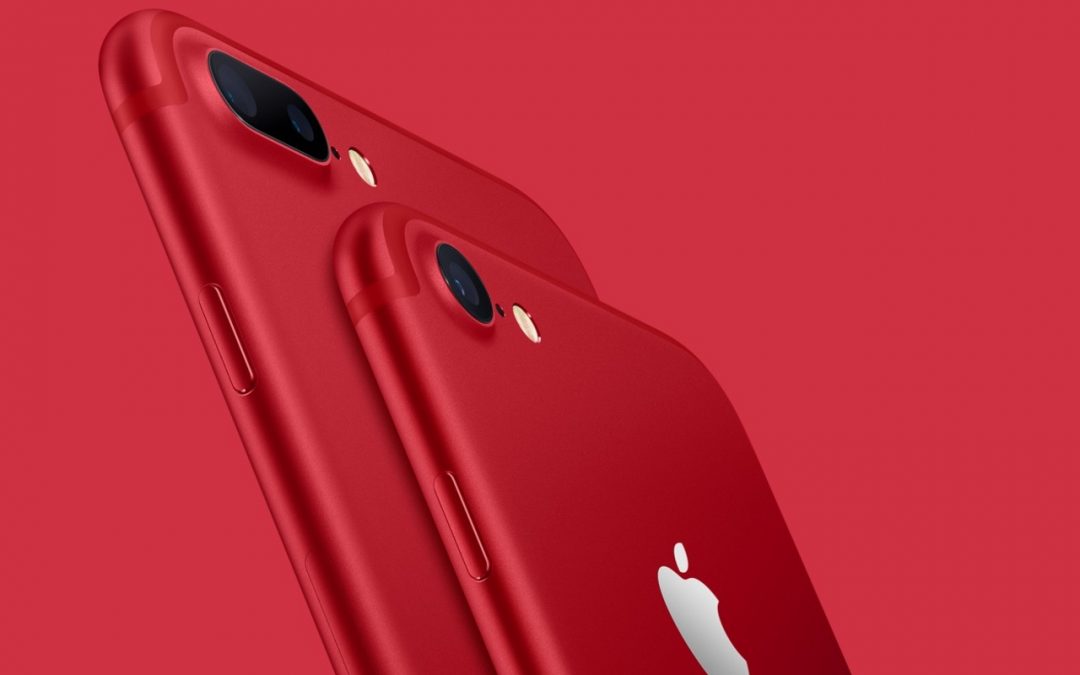
On March 24th, Apple will start selling the iPhone 7 and iPhone 7 Plus PRODUCT(RED) Special Edition models in 128 GB and 256 GB capacities. They’re functionally identical to the existing iPhone 7 and 7 Plus models and are priced the same too, but they come in what Apple calls “a vibrant red aluminum finish.” It’s a strong color that’s a far cry from Apple’s almost pastel rose gold color choice.
And if you’d like a PRODUCT(RED) iPhone, but have a perfectly serviceable iPhone that you don’t want to replace, Apple now offers silicone and leather cases in the (RED) color—they’re not quite as snazzy as the red aluminum finish, but they’re similarly bright.

iPhone SE now holds twice as much

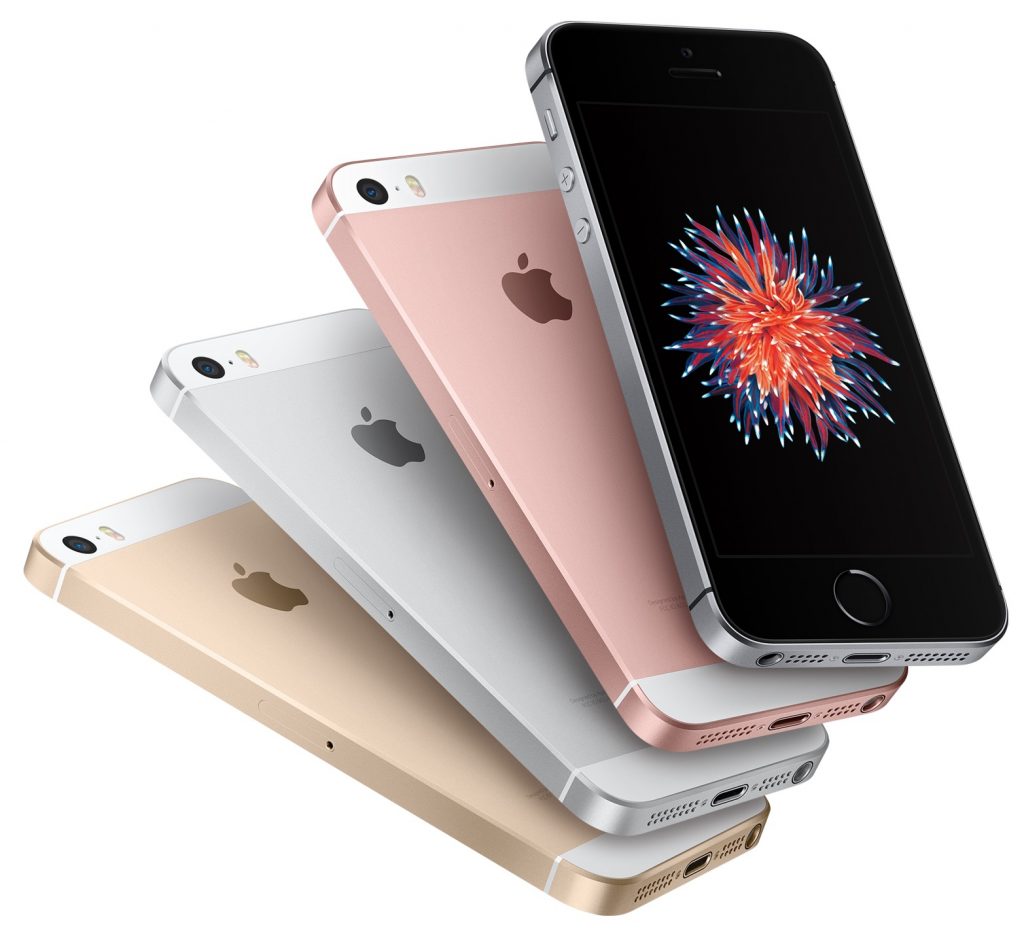
Last, but not least, Apple has doubled the storage tiers for the 4-inch iPhone SE, so you can now purchase a 32 GB model for $399 or a 128 GB model for $499. This minor change is welcome for two types of iPhone users.
First, if you’re looking for the least expensive iPhone, the 32 GB iPhone SE at $399 is $150 cheaper than the 32 GB iPhone 6s at $549. And second, some people with smaller hands or pockets don’t like the extra bulk of even the 4.7-inch iPhone 6s/7, much less the 5.5-inch iPhone 6s/7 Plus. For them, the svelte iPhone SE is a perfect size, and it’s helpful that buying it no longer requires living with only 16 GB or 64 GB of storage.

If you have questions about which of these products is right for your needs, get in touch with me!

Tuesday, March 21, 2017

Hackers to Apple - Pay up or we start wiping phones!

A group of hackers claim that they have access to a large number of iCloud accounts and will start wiping iPhones on April 7th if Apple does not pay a ransom.

The Hackers, identified as "The Turkish Crime Family" have demanded $75,000 in bitcoin or $100,000 in iTunes gift cards in exchange for deleting the list of accounts they are in possession of. The hackers claim to have access to over 300 million accounts. One hacker claims the number is 559 million.

My recommendation - Change your iCloud password NOW and perform a manual backup of your phone to your computer with iTunes.

How to backup with iTunes
How to change iCloud password

Hackers report on Cult of Mac
Hackers report on Motherboard
Hackers report on Metro